 niner bakes

Hi, heute habe ich wieder einen kleinen DIY post für euch.
Dieses mal zeige ich euch zwei Dinge: einfach, aber super niedlich! Anleitungen für eine Kuchen-Dekogirlande und wie ihr aus Konservengläsern oder Ähnlichem tolle Glitzer-Deko-Gläser machen könnt.
Zudem gibt’s die Kuchengirlande und die Girlande für die Wand als Druckdatei zum Runterladen.
Lest weiter…
Los geht’s mit der Kuchen/Tortengirlande:
- Design Zeit Kommt drauf an, wenn ihr das Design druckbereit habt, garkeine Design-Zeit
- Vorbereitungszeit 30 Min. – 1 Stunde (ausschneiden etc.)
- Schwierigkeit Leicht
Diese Dinge braucht ihr um loszulegen:
- Stickgarn
- fertig ausgedrucktes Design
- Kleber
- lange Lollipopstiele
- Schere
- So funktioniert es:
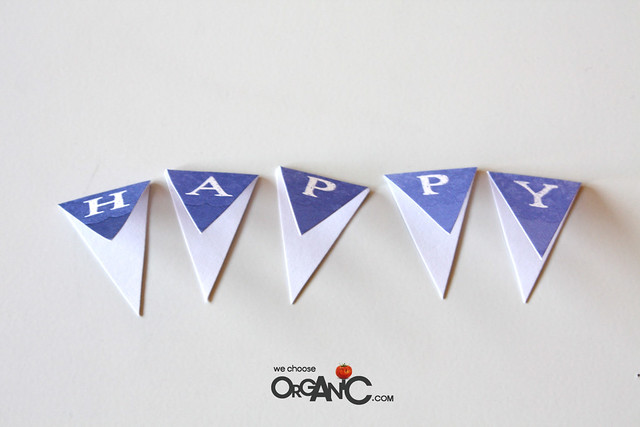
- Start by printing the out the design you made, chose or got free from the web.
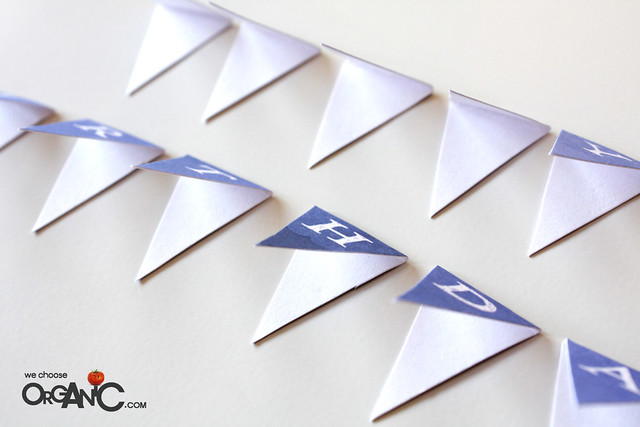
- Now cut your bunting flags out and fold them like in the photo underneath.
- Then I glued just the bottom parts of the flags, left room on the top though, for the embroidery thread to thread through the flags.
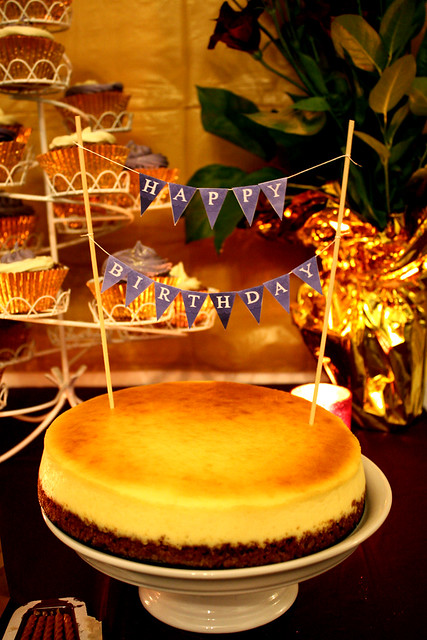
- Now you just need a cake, and the two tall lollipop sticks. Stick them in the cake and tie around the embroidery thread around them.
- This is easy and beautiful at the same time, have a look here.
Download the file here or by clicking on the image

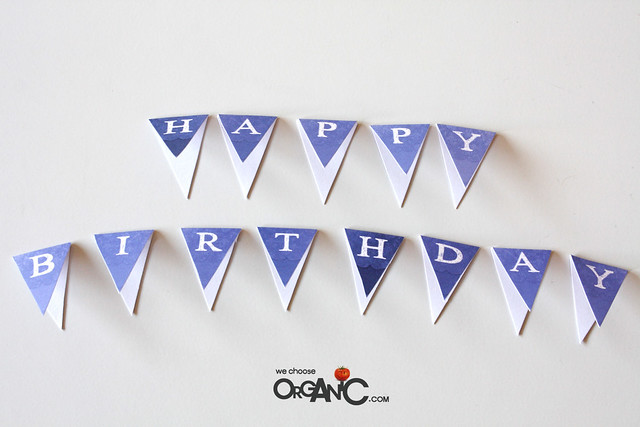
By the way, I used the same design for the wall’s birthday-banner. Same thing, just a little bigger!
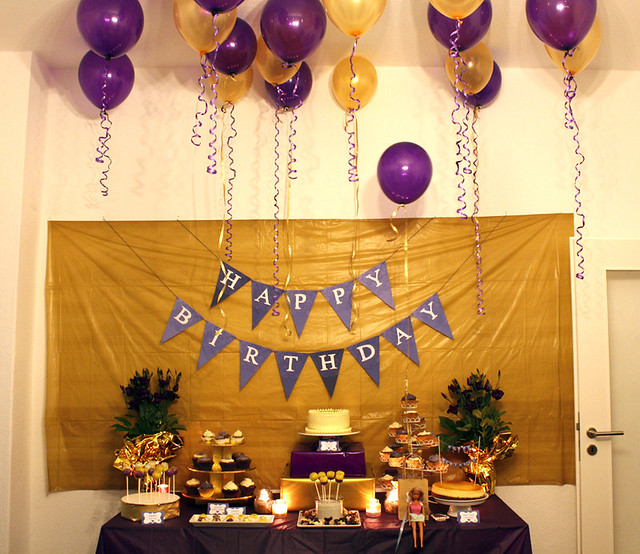
Click on the picture below to download the zip file that includes all HAPPY BIRTHDAY letters for the backdrop garland.

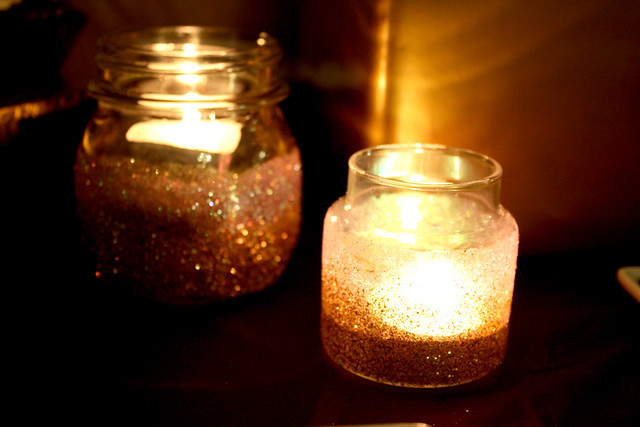
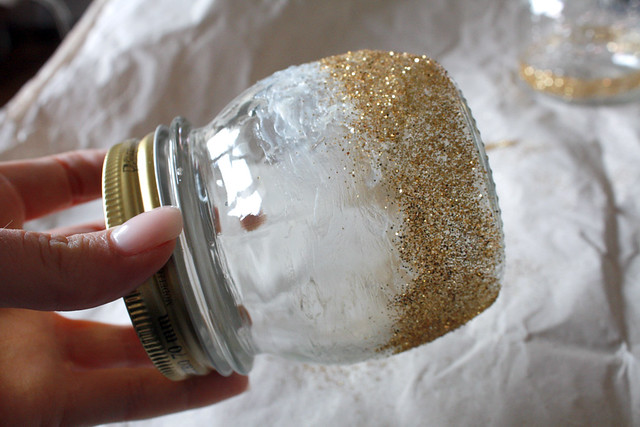
Let’s move on with the glittered candle jars:
- Prep Time 5 minutes
- Time to make these 20 minutes or less
- Difficulty Easy
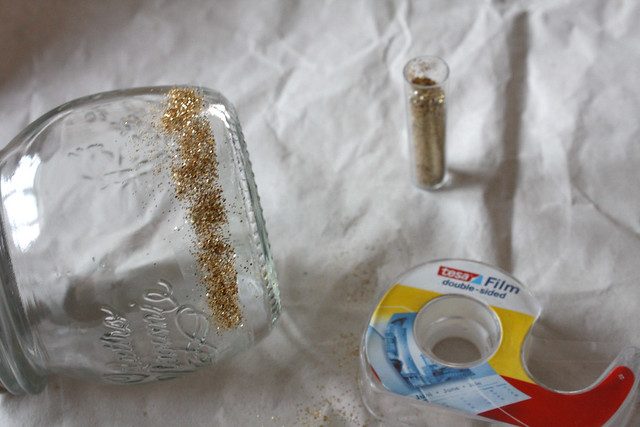
These are the supplies you need for the glittered candle jars:
- any type of jars you choose
- glitter in various colors
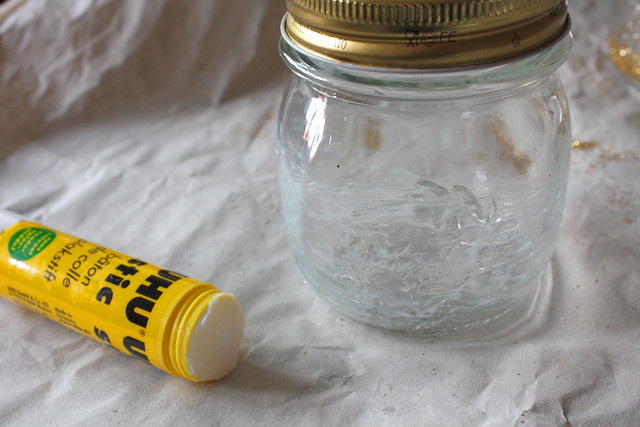
- glue
- tape
- underlayment paper to prevent too much mess
- Spread out the underlayment paper on your table
- You can either choose the „tape“ version or the „glue“ version. I started with the tape version but did not like it as much. Choose this if you want straight lines of glitter on your candle jar.
- So now I chose the glue and that was just so easy. Put the glue anywhere on the candle jar where you want glitter to be.
- Then sprinkle glitter on the glued spots, use your fingers too to spread it more, it worked very well.
And this is how it will look like in the end: Purple and gold glitter. I used these jars for the birthday party we through for our friend Kris, check out my blogpost about it here.
These two colors combined are so sweet. Gives a truly warm and festive atmosphere. Plus you do not need to go to the store, you only need your favourite colors of glitter and glue and get it started.
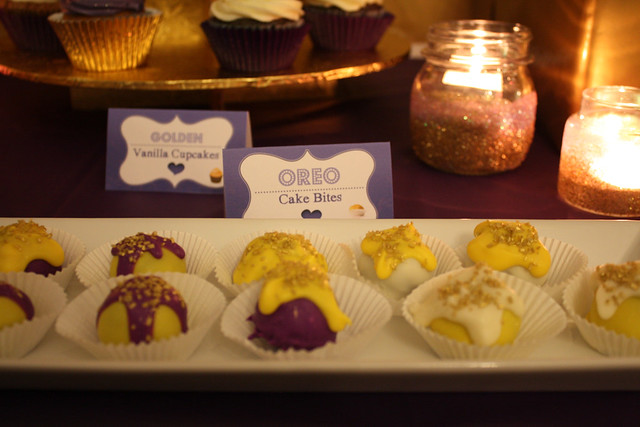
It is really simple and I think it’s a great treat for christmas. People will love them, I bet!
Feel free to share the printables and have fun with it :-)
Have a good week,
Blessings…niner


")
 + Gewinnspiel: Photobox.de Gutscheine")


Niner! SOO many wonderful things in this post! I love love love the Birthday banner (thank you for the free printable!), and those glittered jars are so *perfect* for Christmas! I think I’ll make them with Hannah. xo
Hi Marian, thanks so much for your comment and yes I think Hannah would love to play around with glitter, let me know how it went :-)
Much love as always,
niner :-)
Thanks for sharfing your thoughts on cake pops recipes.
Regards