Hi everyone,
I really have to share with you this amazing video I have seen yesterday, and the day before yesterday…and today :-)
It’s a proposal, a lip-dub proposal. Lip-Dub what, you ask?!
Please click here to see „Isaac’s Live Lip-Dub Proposal“ – seriously, you will be weeping – I cry everytime I see it, it’s true. That video got played over 8 million times already.
What a lucky, lucky woman…and I am sure a lucky man because he must really love her – I was just speechless, to see all these family members and friends to plan such a great proposal that will never be forgotten. That shows love is all around, and we all should remind ourselves how important it is to just love to one another.
Not to mention that I can’t get this song out of my head, right? :-)
Anyway, I think this is perfect timing to show you guys how to make Wedding Cake Pops, Grooms and Brides, ladies and gentlemen.
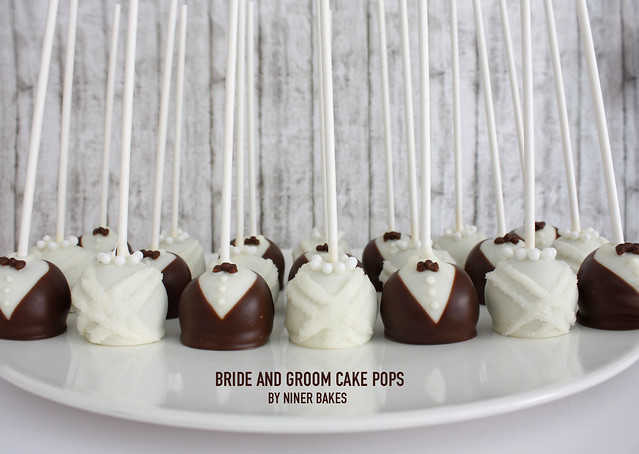
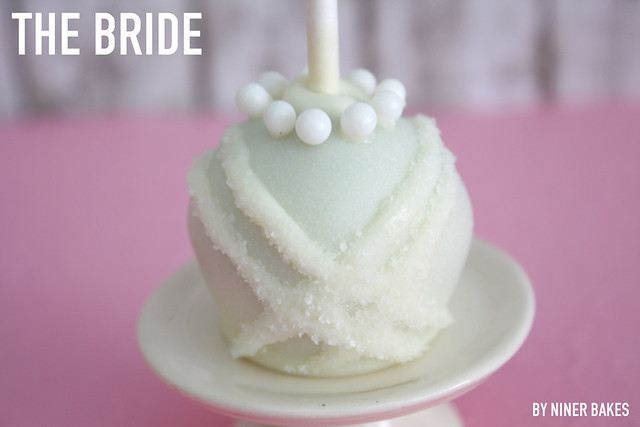
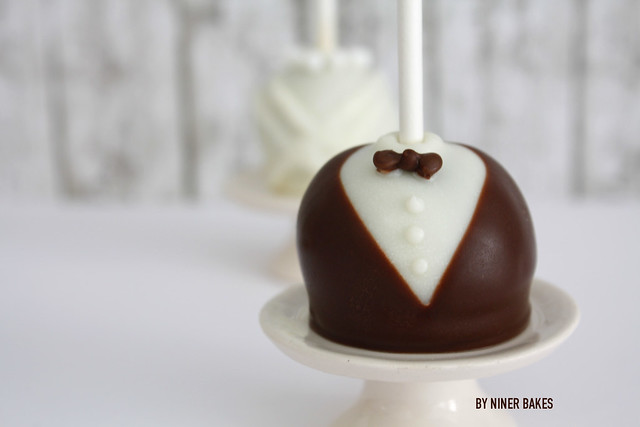
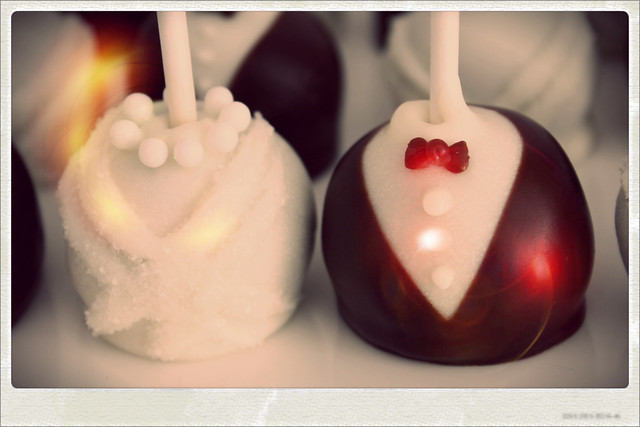
I have many wedding orders at the moment and this weekend, a lucky couple gets to eat these with many of their guests:
You want to make some of these?
Please read on to see the tutorial on how to make Bride and Groom Cake Pops.
- Prep Time 30 minutes
- Baking Time has to be chilled in refrigerator before serving
- Difficulty Medium
For making Cake Pops please visit this link.
When you have your Cake Pops ready to get decorated as brides and grooms, you need:
- uncoated basic, round Cake Pops, chilled in refrigerator
- white candy coating
- brown or black candy coating
- Lollipop Sticks
- Wax paper
- Toothpicks
- miniature brown or black heart sprinkles
- white round sprinkles
- tweezers
- microwave-safe plastic bowl
- white Sanding Sugar
-
Let’s get started:
- All the Cake Pops will have a white candy coating base, brides and grooms.
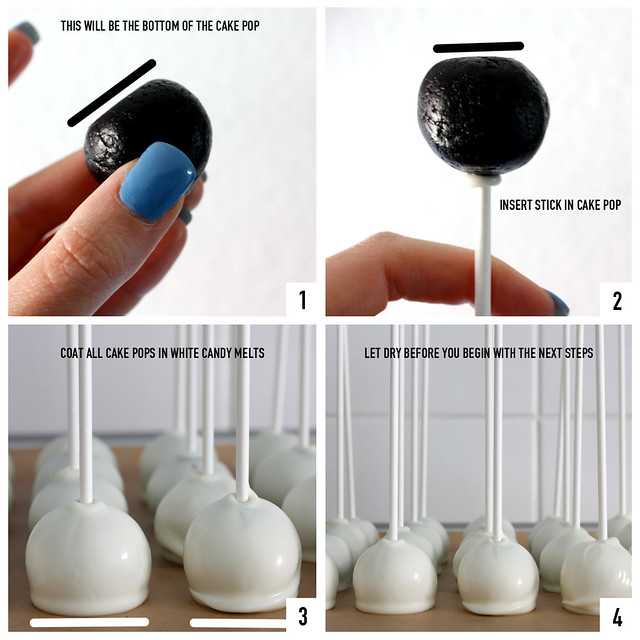
Melt your white candy coating in a microwave-safe plastic bowl, following the instructions that stand on the package. Take a chilled Cake Pop (remove a few cake balls at a time from the refrigerator, keep the rest inside) and you will see the bottom is perfectly straight and even, this will be the bottom of the Cake Pop.
Dip a little bit of the lollipop stick into the melted candy, then stick the lollipop stick in the Cake Pop (half way) and dip the Cake Pop in the melted candy wafers. Tap off any excess of coating. Now place the coated Cake Pop on wax paper. Follow the steps with all cake ball you got, then let them all dry. - For the grooms Cake Pops:
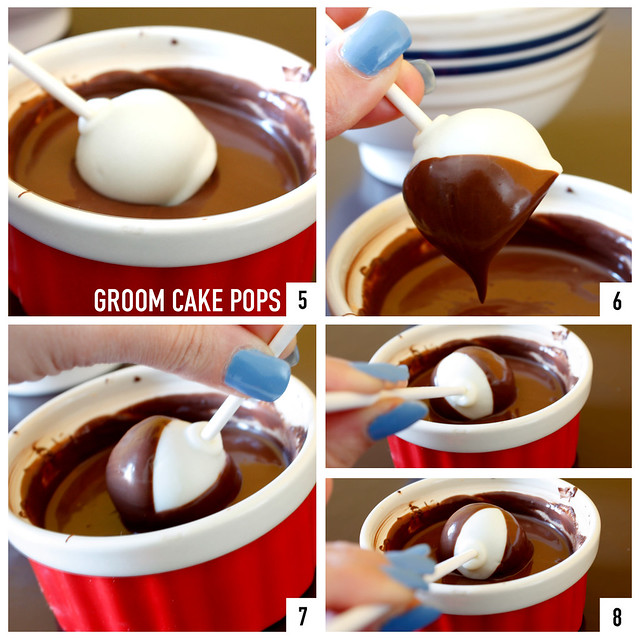
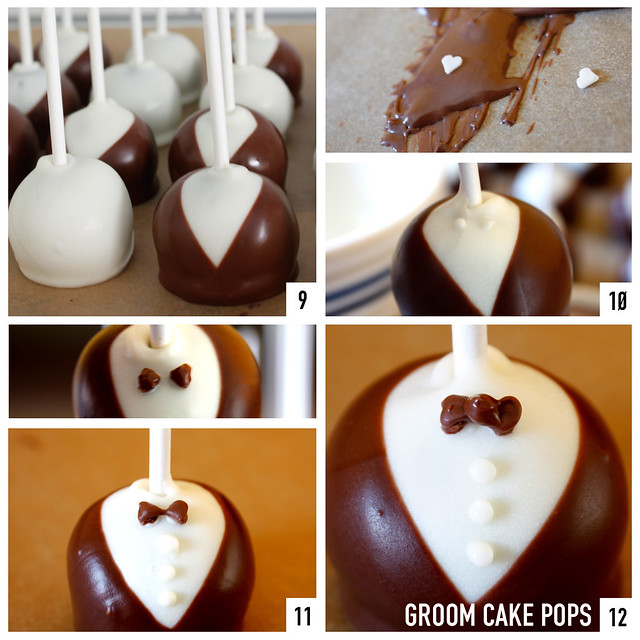
heat up your brown/black candy coating in the microwave. Now dip the groom cake pops in the dark candy coating, hold the pop in a diagonal direction and dip it into the coating just as you see in the pictures above. To make the „jacket“ complete, dip the other side now, in the opposite diagonal direction, so it looks like a V-shaped jacket. The back part, I tend to „even out“ a little as you can see in step 8 of the picture.
Follow these steps with all the groom Cake Pops, then place on wax paper to let dry completely. - When all Cake Pops are dry, I coated white heart sprinkles in brown candy coating because I did not have any dark heart sprinkles left. Now use a toothpick to dot a small amount of melted white candy coating in position the groom’s bow tie as you can see in step 10. Now attach the 2 heart sprinkles (the pointed ends of the hearts should be facing each other). Now it does not look that fancy yet, but when the sprinkles are dry, I apply a little bit of candy coating over the heart sprinkles (with a toothpick, very carefully) – where the two pointed sides meet. After that’s dry, I dab a small dot right in the middle of the bow tie. Then, use a toothpick, place 3 little dots of white candy coating for the groom’s buttons. Let it all dry.
- Now for the brides Cake Pops:
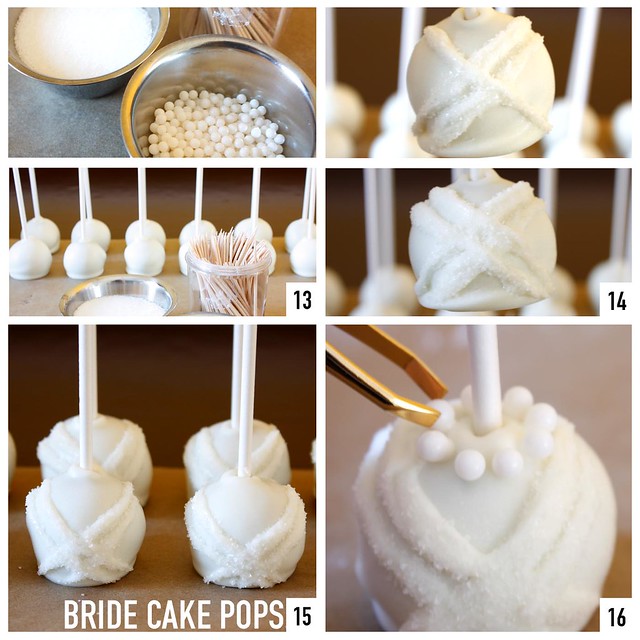
Use white candy coating for the bride’s dress: Dip toothpick into the coating and then run thin lines of candy coating in opposite directions on the cake pop to form the dress (you can also use a squeeze bottle for that). Attention: That dries quickly so right after that’s done, sprinkle sugar on top to make the dress look elegant.
Use a small amount of melted white candy coating in position for the bride’s necklace, apply little dots where you want the necklace sprinkles to be. Using tweezers, place the sprinkles on top of the candy coating dots.
Now let all your grooms and brides dry completely, decorate with ribbons etc. for a nice gift et voilá, you’re done :-)
I absolutely love these cake pops. Unfortunately it does take a while to make them, but oce they’re done, it was totally worth the time. I mean just imagine giving these away, especially to people who never even heard of cake pops, you will blow them away with this treat.
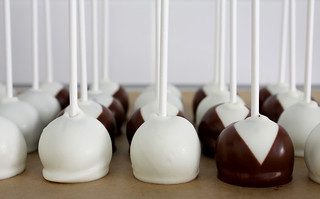
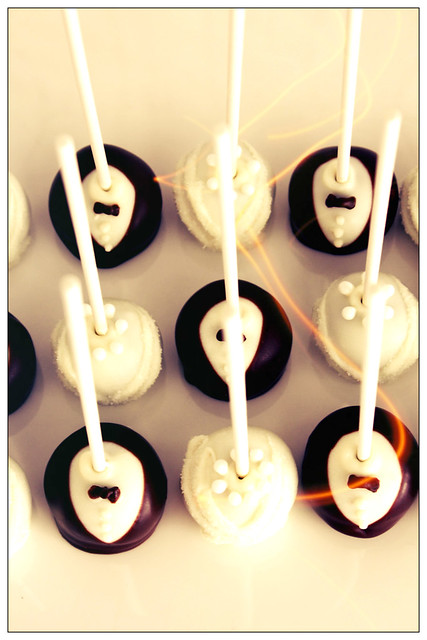
I made a couple of more instagram-like shots, I just love the effects!
Check out my flickr album MARRY ME CAKE POPS for all photos, if you like.
Alrighty, I’m off, watching this video again :-)
Blessings and marry on :-)
niner
 niner bakes
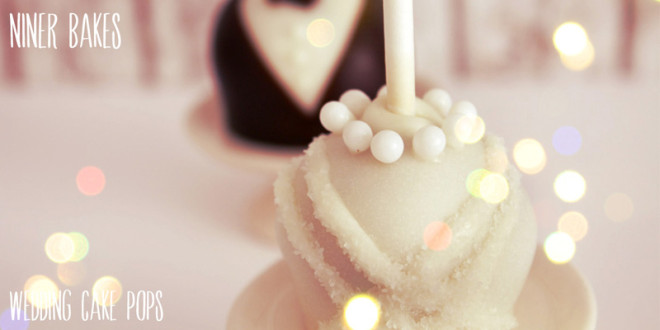
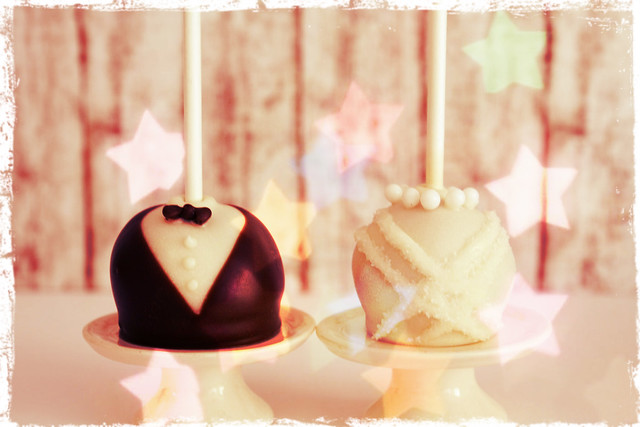
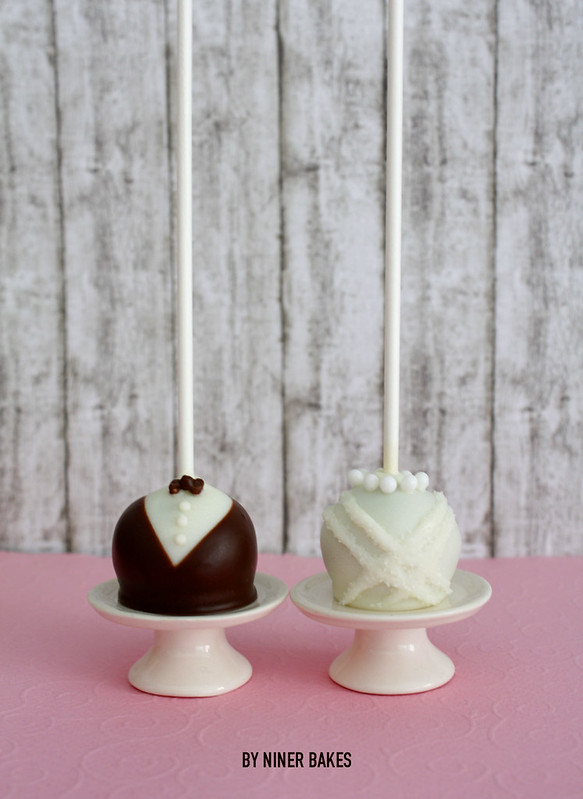
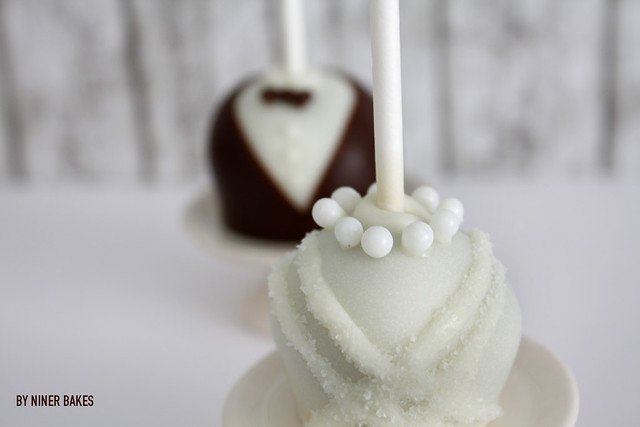


I was so curious how I could do those designs. Thanks so much for this tutorial.
Haha hi Efty, now you can make those too eh? IF SO, let me know, I would love to see :-)
Besos, niner
Oh Niner, these are super duper cute! The tutorial is so thorough and excellent too! You amaze me with your talents! xoxo
Thanks sweetie, not new invented but these are just…so special to make and to look at. Thanks for stopping by sweetie.
xoxo..niner
p.s. I love the video! It makes me happy every time I watch it! (oh and yes, it made me cry too…). xo
haha me too, girl. EVERYTIME I watch it though :-) Dont know whats wrong with me haha…
xoxo, niner
I thought that was a touching video as well. To somehow get everyone in on the proposal too! Thanks for this cute creation!
Hi there Stephanie, you are so right…it was probably the most touching video I have seen in 2012.
Thanks for liking my Pops.. stop by every now and then :-)
niner
Niner, You are the best. You are soo creative and very thorough in your tutorials. I recommend you to all my mommy friends. These really look good.
Nikii, you are wonderful, thanks so much for your words!! Thanks for coming over miss :-)
Many blessings!!
niner
Hello! Just descover your site and start loning it!! You are so talented!!
Im thinking about doing them for my casual wedding party…Can I ask you how long it last? Does it have to be the same day that you eat them?And do they have to be in the fridge?
Thank you for sharing all your work with us. Inspired me a lot!!
Hi Gemma, so great you stopped by!! Thanks for your kind words, it is SO appreciated! You can prepare the Pops definitely like 4-5 days ahead and then keep them in the fridge – this is how I do it a lot of times. So it is not stressful at all (one day ahead is stressy isnt it) and you are not much in a hurry.
Blessings to you,
niner
lovee it .it looks so professional .im looking forward to more postss!
O Admin, Tell me How I give a Beautiful Thanks. No doubt you are so talented. Your tutorial is very nice and all cake are so cute. I have subscribed your blog feed for all the recipe as i hope that you will post more cute creation. Thanks and Lot of Love to very Talented and Nice guy
Hi Alice, thanks for your visit and for your kind words, thank you so much!
Blessings,
niner
These are adorable.! Your website is absolutely amazing. My grandmother is getting married in November, and I am looking for unique ideas for her. Since I am making the cakes, I am looking for „extras“ to surprise them with. I had seen these cake pops on pintrest, but I wasn’t sure how to make them. Thank you for the thorough tutorial.!
Thank you so much Kami, I am glad you like the wedding pops and I hope it will easy for you to make them.
I hope it will be a wonderful wedding.
Many blessings,
niner
Wunderschön! Meine Idee war jetzt noch: Foto der Gesichter von Braut und Bräutigam an die Stiele kleben :-)
Hi Ulrike, das ist echt eine tolle Idee!
Alles Liebe! niner
Amazing!! How do you make the candy coating dots?
Hi Maggie,
I piped them and sometimes I just use a toothpick and apply candy melts with those.
Many blessings,
niner
Hello! So pretty. My co worker just ordered 400 pieces for his wedding in August. Not sure how much to charge. I usually charge $15/dozen for cake pops. Can you please help me? Thank you =)
Love the tutorial! where did you get those tiny stands from? they are so cute!