 niner bakes

Happy New Year everybody!!
I hope everybody had a peaceful and absolutely wonderful celebration of Jesus’ birth, and of course a great time with family and friends during New Year’s Eve.
I know it has been a good minute since my last blogpost but I have moved in December and things were just hectic, hectic, hectic, no time for blogging much but now I am back in full effect :-)
Last week I made a Cake Pop and Cupcake order for a wedding/bridal fair, Germany’s biggest, which takes place in Hannover and that, coincidently happens to be where I live.
The souvenir and gift article shop “wonderland4u” contacted me because they wanted to have a Candy Bar at their stand at the fair. So they needed Cupcakes and Cake Pops, designed food tents and a backdrop garland.
For the Cake Pops I decided to make white and pink ones, red heart shaped Cake Pops to fit the wedding theme perfectly. Same for the Cupcakes: I chose Vanilla and Chocolate Cupcakes with white and pink creamcheese frosting.
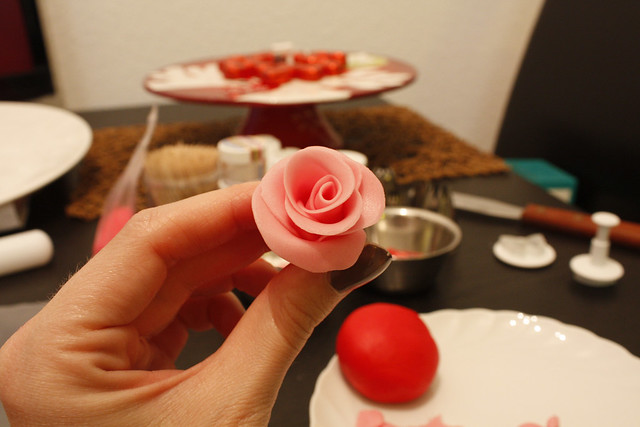
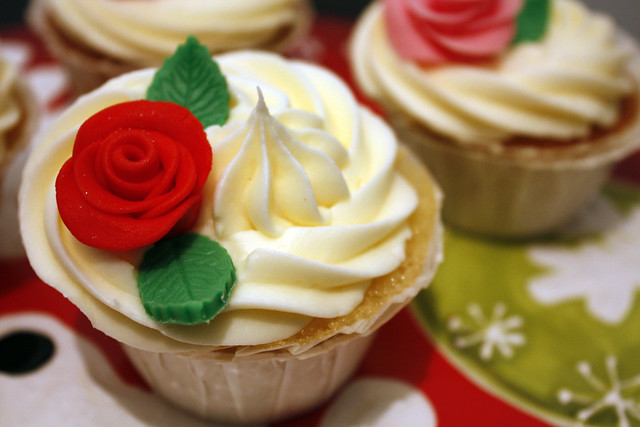
But to make it all look more elegant, I made fondant roses and leaves – giving it all a romantic touch, you know :-)
I did not take brilliant how-to photos (sorry about that) but I just want to show you guys that fondant roses aren’t too hard to do.
Please read on to see more photos and instructions.
Working with fondant is a lot of fun, I tell you!
- Prep Time 5 minutes
- Time depends on how many roses
- Difficulty Medium
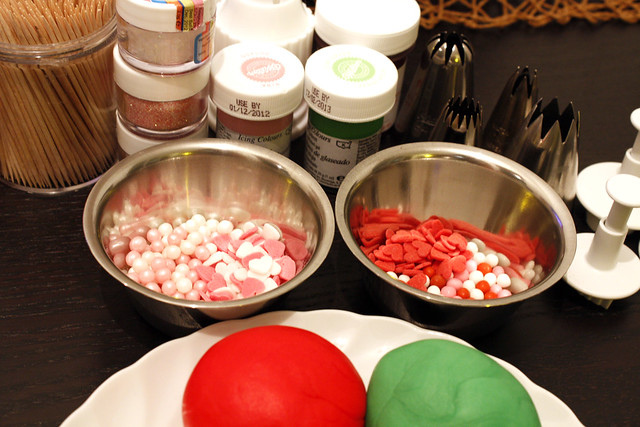
Before you start make sure you have the Cupcakes frosted, and get the following equipment ready to use:
- Fondant (white fondant so you can color it yourself or buy colored fondant in red and green)
- Gel food coloring of choice ( Iusually use Wilton)
- A plastic mat
- icing/powdered sugar (for the mat so the fondant won’t stick)
- A rolling pin
- Rose Leaf Cutter/Plunger
- Toothpicks
- I used a mini peanut butter mold for the leafs to dry
- another mat for the roses to dry
- plastic foiling pocket
- Place a few drops of gel food colouring or use a toothpick and take out a single amount of gel paste on your fondant and work it in. Knead really well until all the colouring is distributed evenly. It does take a while so be patient :-)
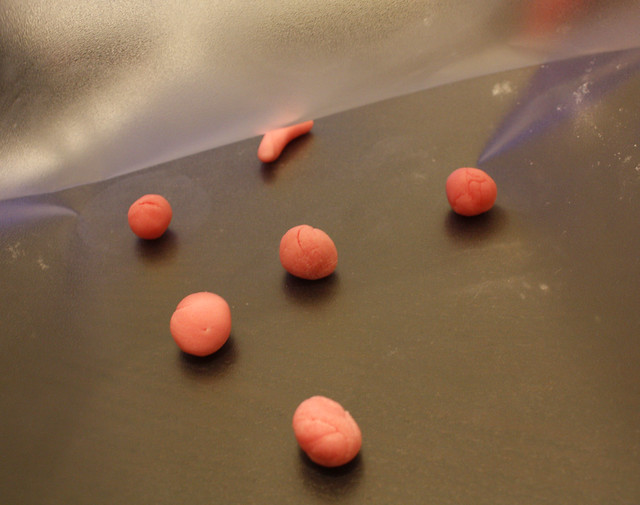
Keep adding coloring until you have your desired color. - You want each piece to have the size of a marble or smaller
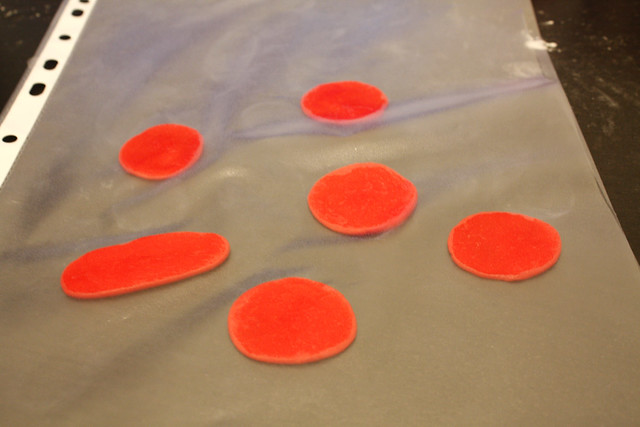
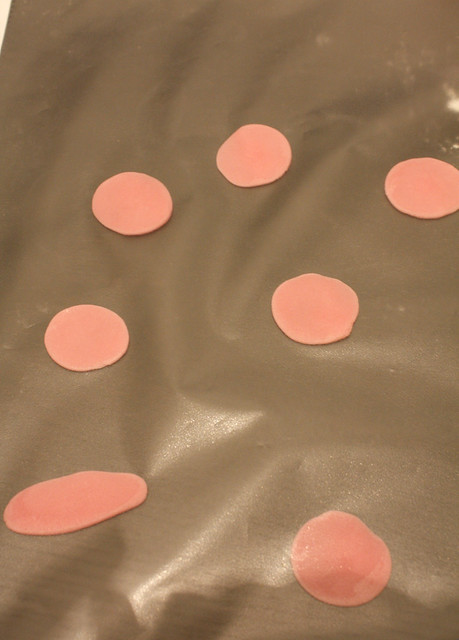
- Break off or cut off 4 or 5 small pieces of fondant and roll them into tiny balls. These will be the petals of the rose. Place them into the foiling pocket.
- Break off 1 more small piece, roll it into a longer shape, just twice the length, so it looks a little like a cone shape
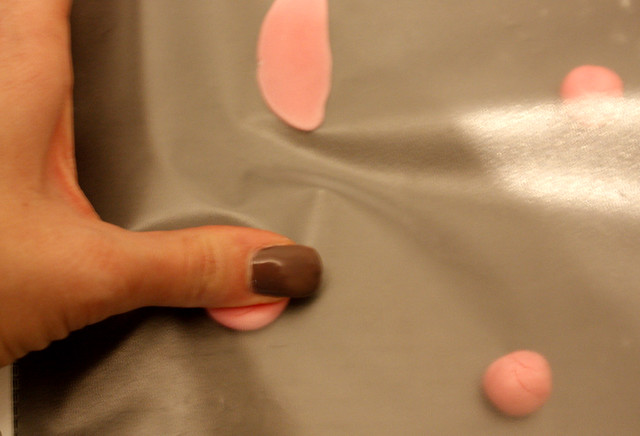
- Place all the little pieces between the plastic foiling pocket.
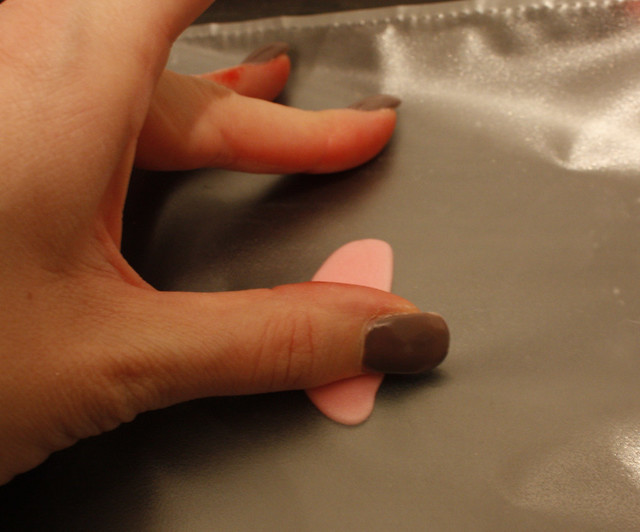
- Now use your thumb and smooth each of these shapes, until they’re quite thin. The top should be a littler thinner than the bottom though.
- Now, flatten the cone shape. It does not have to be perfectly. I do it pretty quick, especially when you have to make tons of fondant roses :-)
- Now flatten all the balls evenly.
- The flattened cone shape will be the center of our rose, so gently roll it up, very small, then let it get wider. Take a petal and put it over the center you just rolled up.
- We will line up all of the thicker edges (of the petals) all at the bottoms and the thinner edges all towards the top.
- The second petal goes half way inside the first one, roll it around. The third one goes half way the second one, and roll it around again.
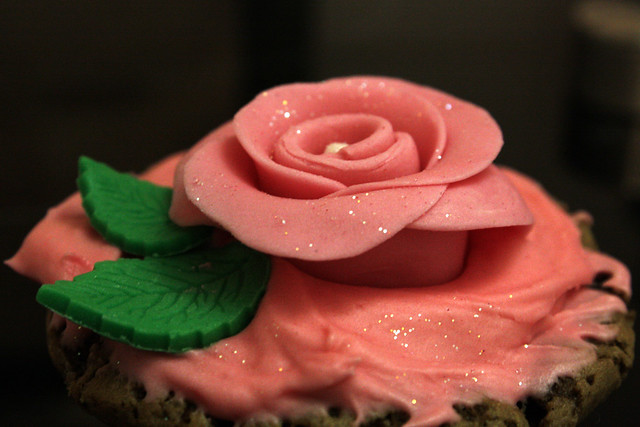
- Until you have them all evenly spaced around. Now shape the petals, pull them back a little bit, giving them little pinches here and there on the edges to make them look more natural.
- The bottom you can just cut off and there you have it. Place it on a board to let it dry.
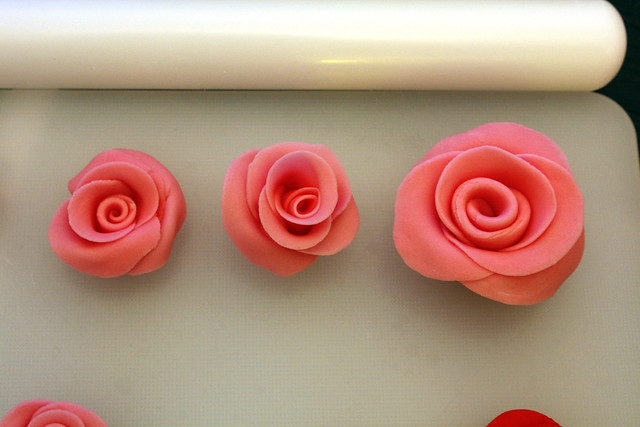
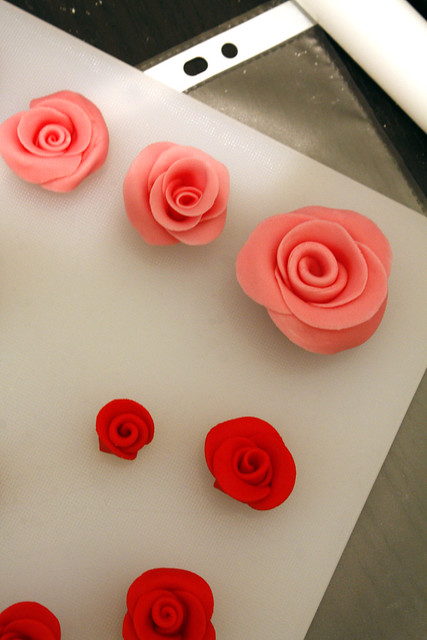
Now how to form your rose shape:
As you can see here, from right to left: I started quite big. With each new rose I made the balls smaller and smaller, so you can create whatever size you like or need for cupcakes or cakes decorations.

For the leaves I colored my white fondant green, rolled it out with a rolling pin, very thin, but as you can see: they could have been way thinner :-)

I used too much of icing sugar as you can see. It would be better if you try not to have icing sugar all over the place, especially not on top of the leafs, so try to use tweezers, not your icing sugary hands to lift them up, if possible :-)
I cut out the leaves with a Rose Leaf Cutter/Plunger and then placed each leaf into a peanut butter cup mold. This way they are a little curvier in the end.
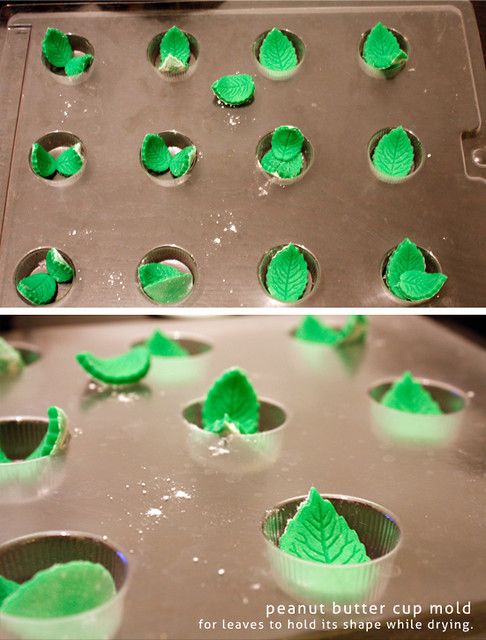
There are numerous ways to let the leaves dry. You can also use Foam Drying Trays or Foam Pads. Will definitely get one of these, it just works more precise.
Note:
– Always use a clean surface. Any tiny little speck of dirt will change the color of the fondant.
– Fondant dries very quickly. Always cover it when you are not using it. (with plastic wrap)
– Dust your surface with powdered sugar while working to keep the fondant from sticking, it can dry the paste though when you use too much.
And here are some photos on how you can place the roses and leaves onto your cupcakes. It’s better to wait until the fondant roses and leaves are dry, then stick them into the frosted cupcakes.
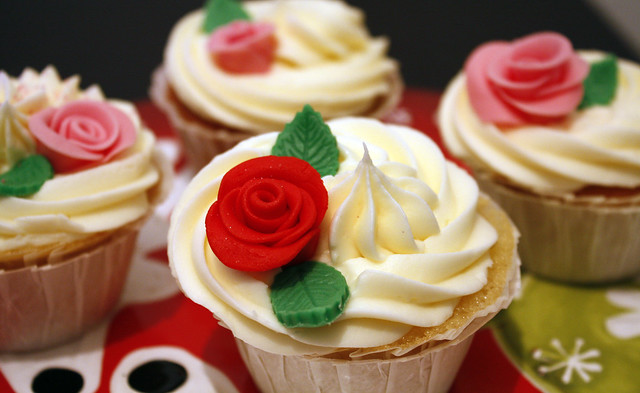
Marian, thanks so much for the piping tip!! I LOVE IT! :-)


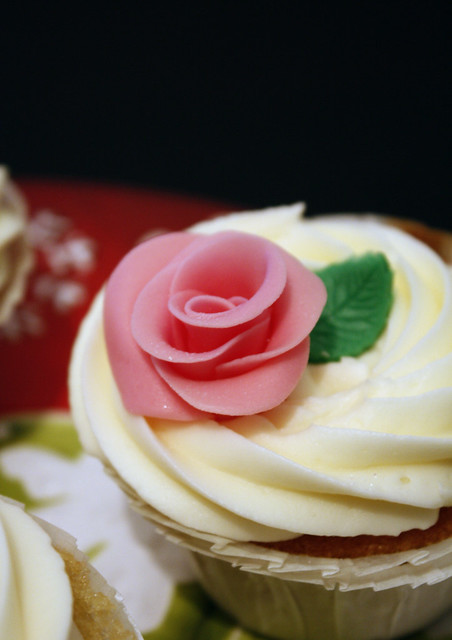
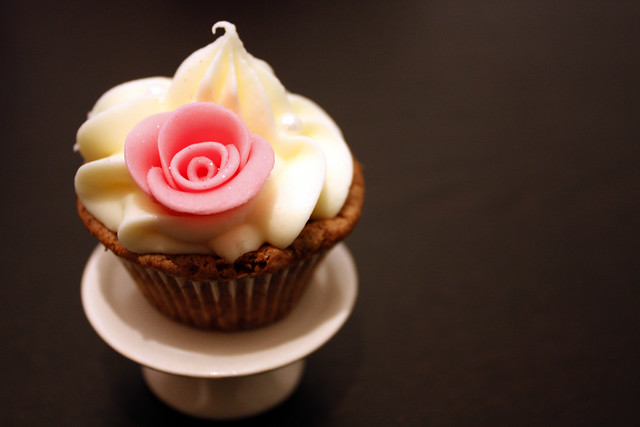
and my favourite: a tiny cupcake with a tiny rose
In my next blogpost I will show you the photos of the wedding fair: the Cupcakes, Cake Pops, garland and food tents designs etc. So stop by again, the Candy Bar looked really, really cute.
Have a good week,
Blessings…niner


")


Hi Niner!
WOW!!! They look absoutely gorgeous! The photos look amazing too! I can’t wait to see the next pictures.. how exciting! The fair sounded really awesome too – wish I could have met you there ;-) Congrats on being asked!
Glad to hear you’re back too and things are less hectic. Missed you!
xo,
Marian
Hi sweets!! Thanks so much!!
Your piping tip in full effect ;-) LOVE IT!
Thanks so much for your comment, it lifts me up everytime. Much love to you Marian!! xoxo..niner
Beautiful work as always!! Thanks for the tutorial.
Thanks a lot Efty!! Great you stopped by :-)
Beautiful work as always!! Thanks for the tutorial.
Thanks a lot Efty!! Great you stopped by :-)
Thank you so much for this tutorial. Im new at making fondant decorations and have tried to make roses before, but they did’t turn out great. Then I tried your tutorial and they are just perfect. Thank you, thank you.
Now I can have roses on my wedding cake, and not just flat flowers.
Thank you so much for this tutorial. Im new at making fondant decorations and have tried to make roses before, but they did’t turn out great. Then I tried your tutorial and they are just perfect. Thank you, thank you.
Now I can have roses on my wedding cake, and not just flat flowers.
Hi Niner…. Thanks for all your tips i am just a pentioner and your tips on making Roses are great. Thank-you please let me know if your doing any more things. Best Regards Eddie.
Hi – I have just found your blog and I love your fondant shapes! Probably a little late but I thought I would post anyway, I never use icing sugar when rolling, I use cornflour as it will rub off and won’t leave white marks like the icing sugar! :) Happy baking!
Hi Laura, thanks for stopping by. So true, I have to try that out, thanks so much for sharing your tips!!
Happy New Year, miss!
niner
These look amazing! Just what I’m looking for!
I was wondering, how long do they last? Also how do you store them to keep them good before use?
Thanks so much :)
Thank you I can’t wait to try these!! do you have your icing recipe anywhere on your blog? Thank You!:)