 niner bakes

Hi ladies and gents!
Spring Has Sprung!
Janine over at sugarkissed.net had the tremendous idea to bring a couple of cake poppers together to create a cake pop collaboration by creating tutorials for cake pops with a Spring theme for all our readers who love cake pops. I was thrilled, so happy to be one of the cake poppers included in this project!
Thanks so much Janine!
Check out everyone who participated:

1. Bunny Cake Bites by Miss CandiQuik
2. Kite Cake Pops by Party Pinching
3. Chocolate Terra Cotta Pots with Marshmallow Topiary Bunnies by Hoopla Palooza
4. Fondant Daisies with Yellow Cake Pop Centers by The Partiologist
5. Chick Cake Pops with Bonnets by sugarkissed.net
6. Easter Cake Pops for Your Dessert Table by niner bakes
7. Springtime Cake Pop Nests by Munchkin Munchies
8. Elegant Spring Flower Cake Pops by Pint Sized Baker
9. Butterfly Kisses Cake Pops by Bubble and Sweet
10. Pastel Sparkle Cake Pops by Heavenly Cake Pops
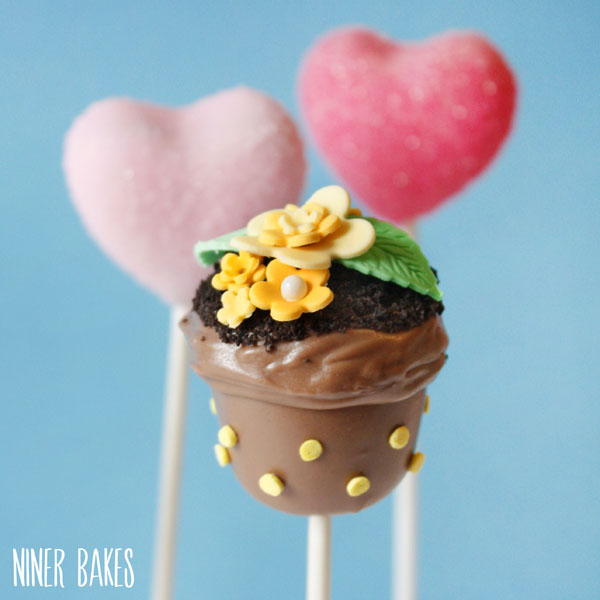
I could not decide for a specific spring/easter cake pop so I made various spring cake pops for you guys, and two of them include a how-to tutorial so you can make those yourself for Easter, yay!
You will get the tutorial for the following Cake Pops (more to come the next couple of days):
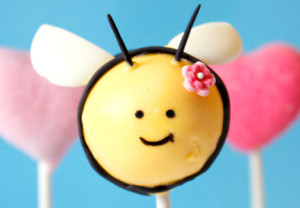
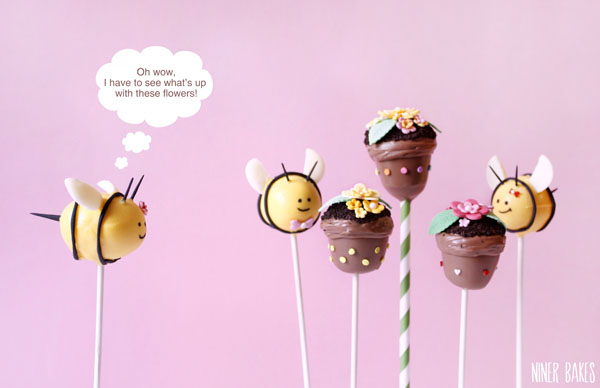
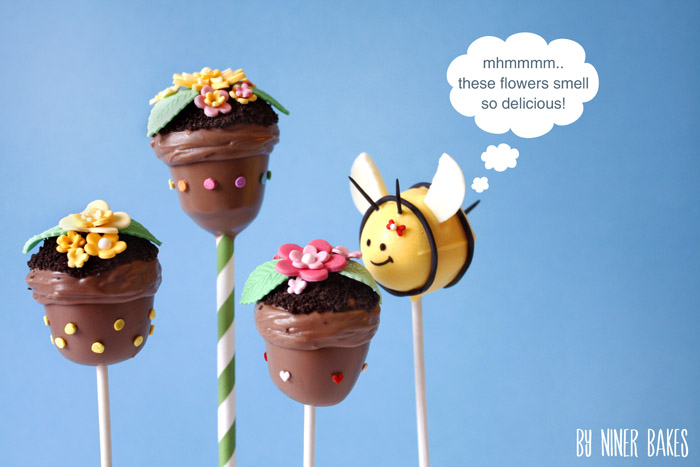
– Bumble Bee Cake Pops
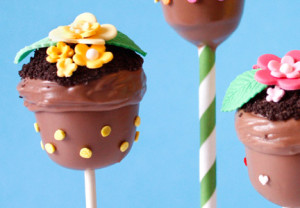
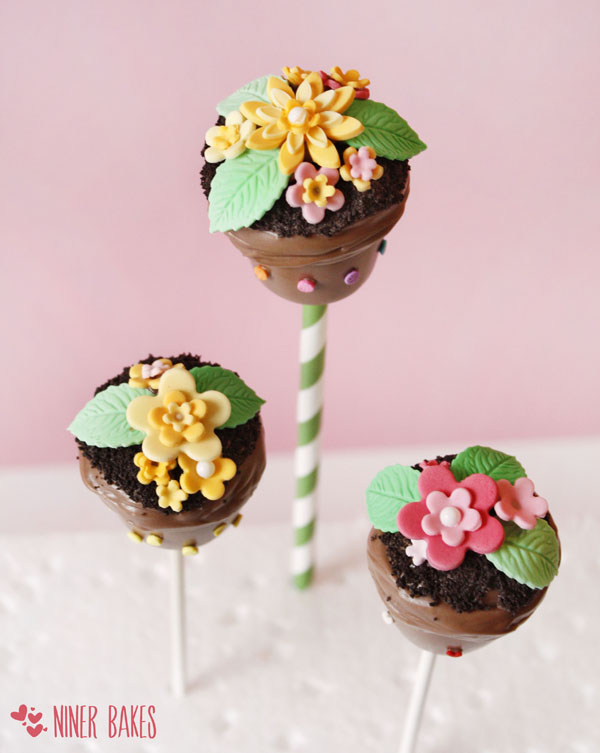
– Spring Flowerpot Cake Pops
Let’s get started:
- Prep Time 20 minutes
- Baking Time 20 minutes in refrigerator
- Difficulty Advanced
For the Bumble Bee Cake Pops:
- Please prepare your cake pops as you normally do or use the ingredients and follow these instructions for the OREO truffle kind:
- 1 package OREO cookies or for Europeans: 3 and a half packages a 176g
- 1 8oz. package cream cheese (I use 176g packages, 6.2 ounces)
- Lollipop Sticks
- yellow candy melts
- white candy melts (for the wings)
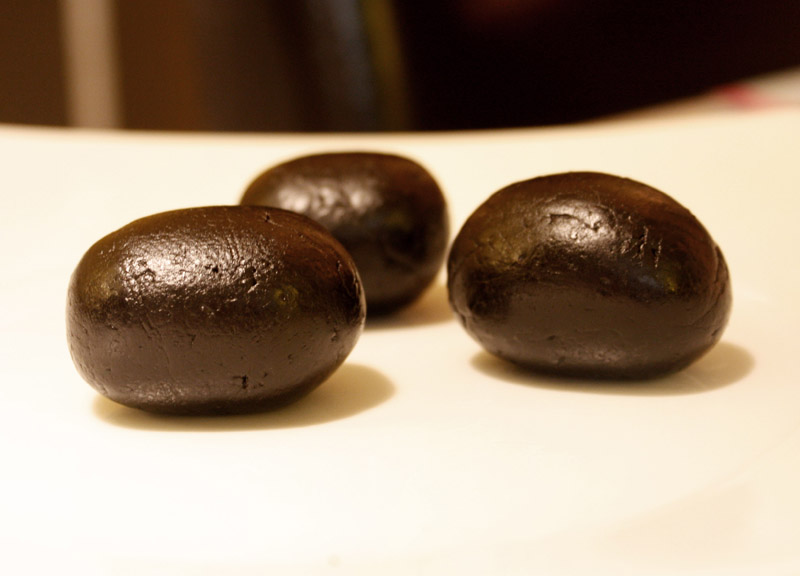
- black fondant or gumpaste (for stripes, stinger and antennas)
- styrofoam block (to dry cake pops)
- heart sprinkles (for extra detailed decorating)
- Edible Ink Pen (to draw face)
- toothpicks
- tweezers
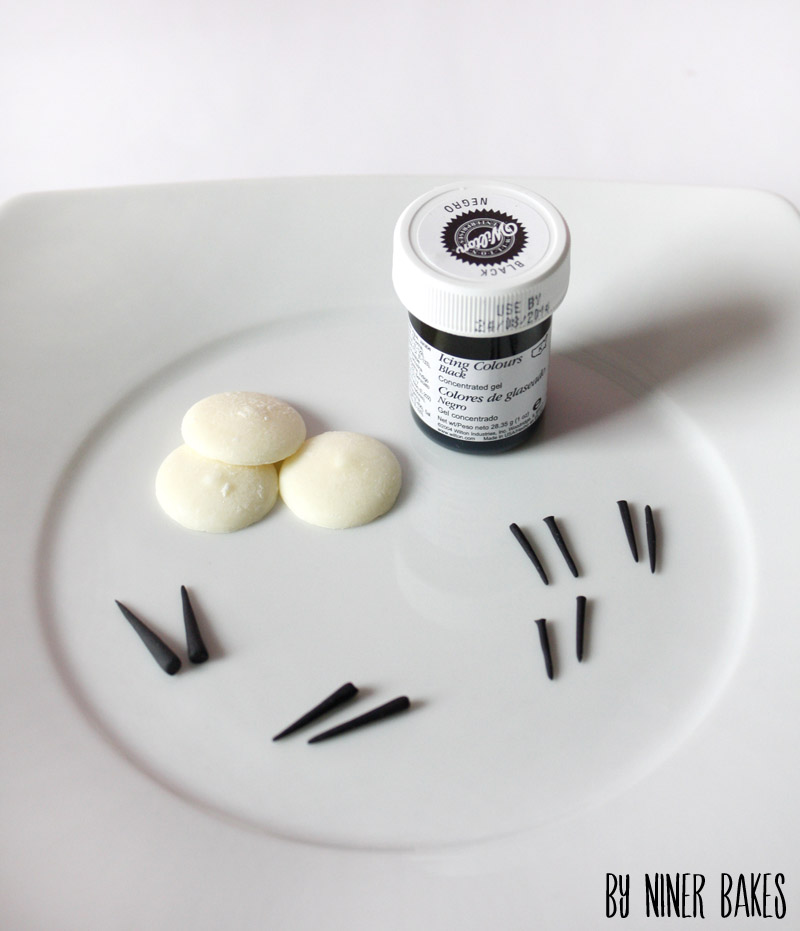
(photo: candy melts for wings, stingers and antennas made out of either black fondant or color your white fondant with black gel/paste food coloring.)
Additional Items you may want to get, makes a nice gift:
- Lollipop plastic covers, to give away
- ribbon for tying, to give away
- Now we are all set and ready to get started: Prepare yourself before you actually start.
Get everything out on the counter you need, so you do not stress yourself in the middle of the decorating process :-) - 1. Now, make your cake pops as usual or my NO BAKE Cake Pops, using Oreo cookies: Grind your OREO cookies to fine crumbs in a Food Processor
- 2. Put the crumbmix into a boal and hand mix with cream cheese. I use gloves though, because it gets messy :-)
- 3. Keep in mind that the dough should have the consistency of play-dough.
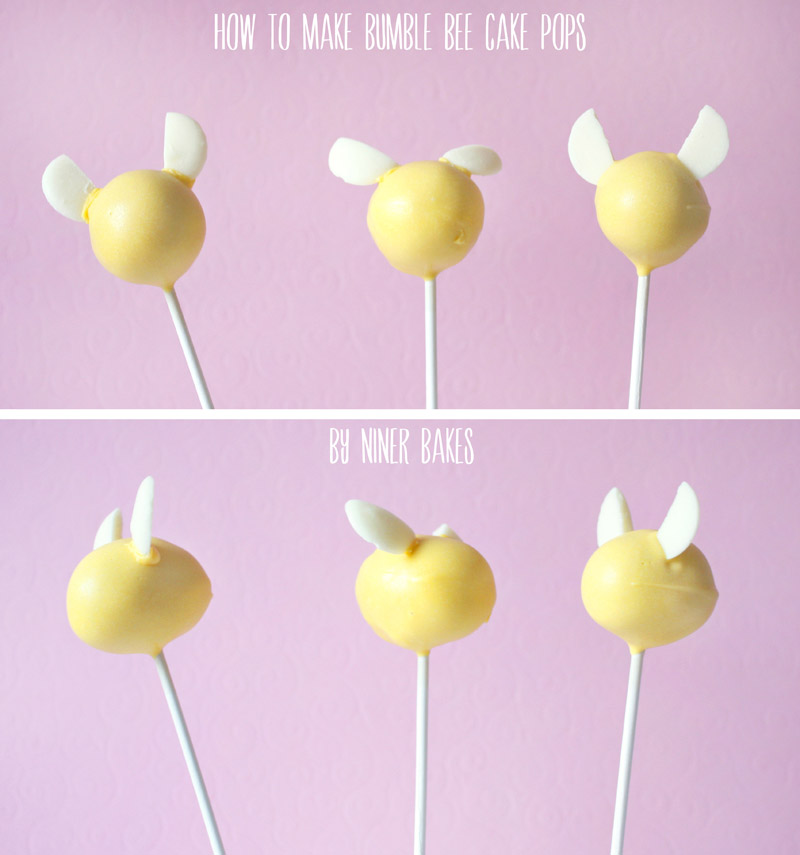
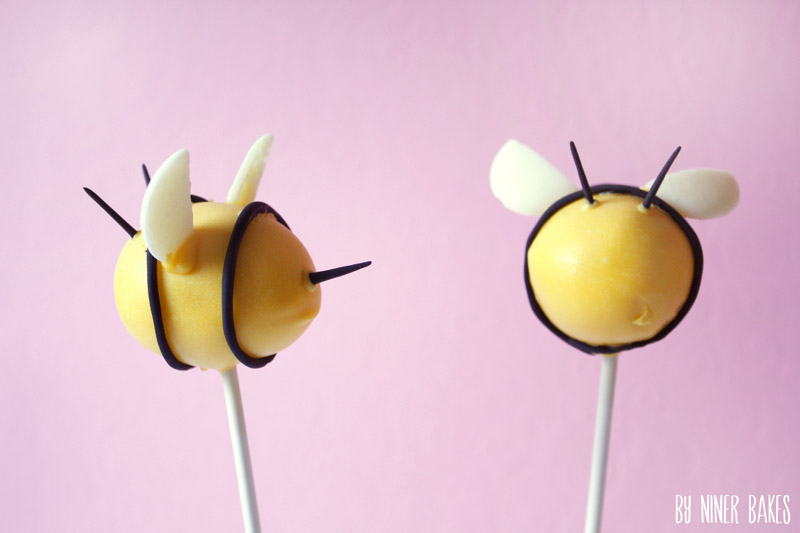
- 4. Shape your cake balls into bee shapes, just like in the photo, then refrigerate them for at least 10 minutes in the freezer or 30 minutes in the refrigerator to firm up.
- 5. Now melt your yellow candy melts. I usually do that in the microwave in 30 seconds intervals. If you are having a hard time with the consistency of your candy melts, click here for my Cake Pops 101 Troubleshooting Guide. If your candy melts are too thick, just add a little bit of vegetable oil and stir.
- 6. Get your chilled bee shaped cake balls out of the fridge. Dip a little bit of the Lollipop Stick in the yellow melted candy, then stick the Lollipop Stick in the Cake Pop (half way). Let the Pops rest a bit in a styrofoam block or cake dummy so the candy melts set within the cake pop.
- 7. Now dip the Cake Pop in the yellow candy melts, shake off all the excess and repeat with all cake pops and let them dry in a styrofoam block.
- 8. For the wings, use two white candy melts and cut 1/3 off with a knife or a round cookie cutter. Now simply attach the wings (hold them in place because they might fall to the side) to your bee cake pop. See? Looks a lot more like a bee now.
- 9. For the stripes, I used black fondant stripes and “glued” those on the cake pop with yellow candy melts.
Other options: You can either use fondant like I did, or get an edible ink pen and just paint the stripes on the cake pops, for the head and the back. Or if you happen to have black food coloring around, take a toothpick and paint the stripes carefully on the bee pop.
Last but not least, you can do the same with dark melted chocolate. - 10. Now it is time to attach the stinger and the antennas:
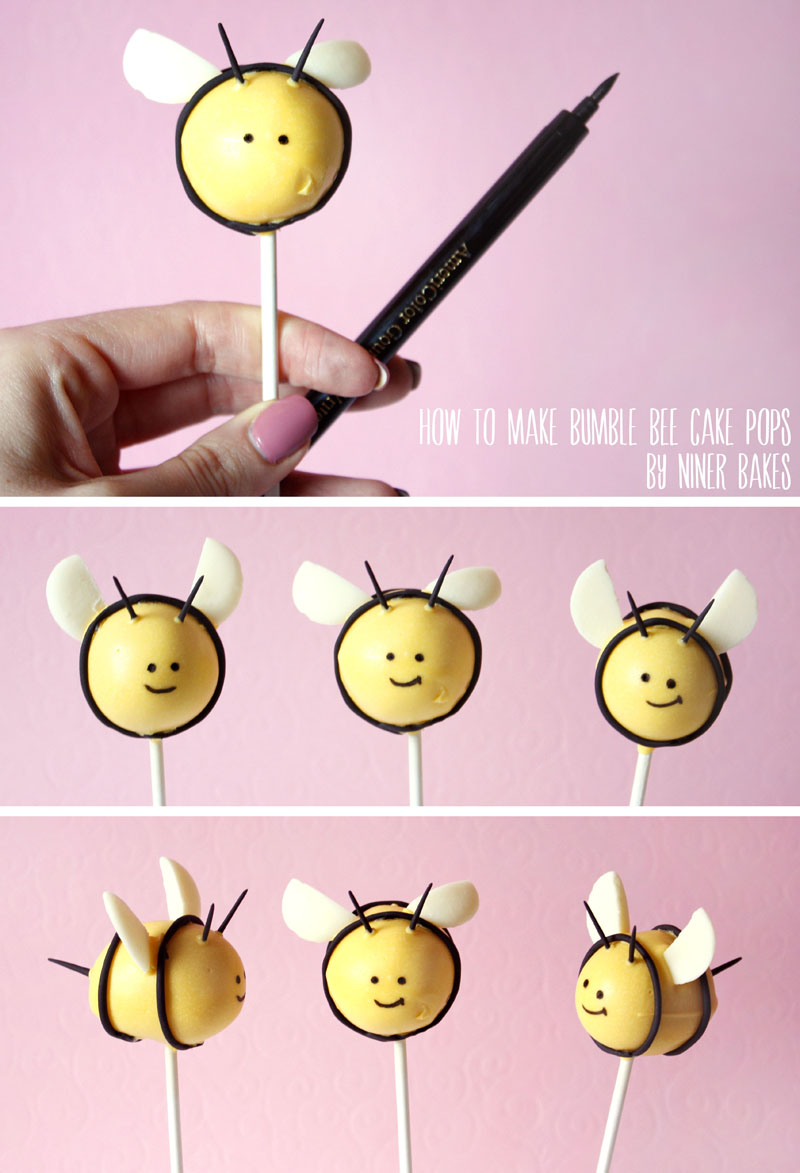
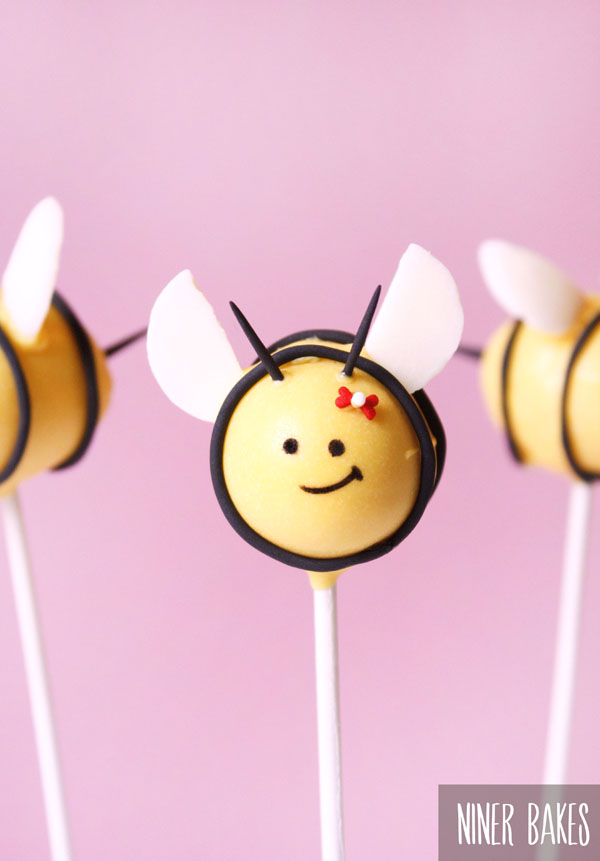
Use yellow candy melts as glue, hold the stinger in place and wait a little bit so it does not fall off, same thing goes for the antennas. You might want to not attach the antennas and stingers if you want to send your cake pops away because they will fall off during transportation. - 11. Paint little faces with an edible ink pen and attach little cute details such as bows using 2 hearts sprinkles.

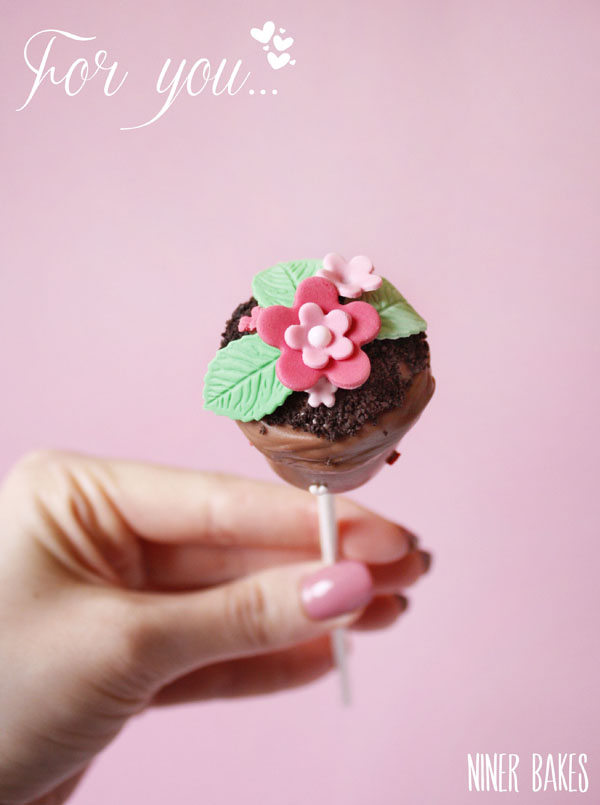
Let’s make the flowerpot cake pops:
- Prep Time 20 minutes
- Baking Time 20 minutes in refrigerator
- Difficulty Advanced
For the Spring Flowerpot Cake Pops:
- Please prepare your cake pops as you normally do or use the ingredients and follow these instructions for the OREO truffle kind I explained above (Bee Cake Pops)
- Lollipop Sticks
- brown candy melts
- icing flowers or fondant flowers and leaves (for extra detailed decorating)
- colorful sprinkles for the outside of the pot (for extra detailed decorating)
- crushed Oreo cookies or any other dark cookie (for the pots top)
- heart sprinkles (for extra detailed decorating)
- styrofoam block (to dry cake pops)
- toothpicks
- tweezers
Additional Items you may want to get, makes a nice gift:
- Lollipop plastic covers, to give away
- ribbon for tying, to give away
- Now we are all set and ready to get started: Prepare yourself before you actually start.
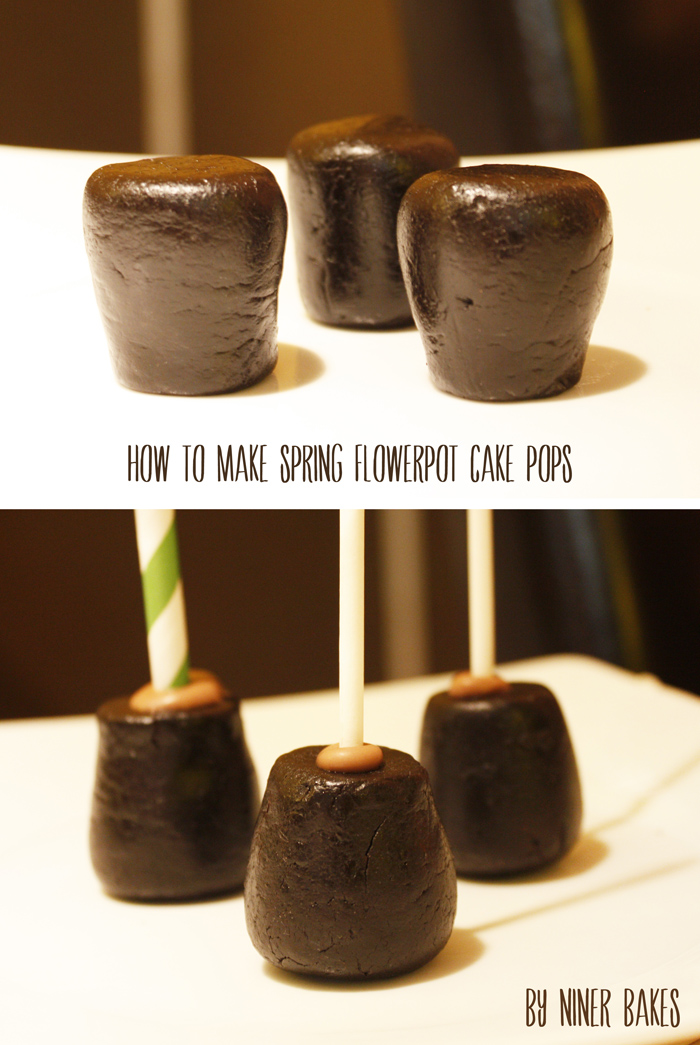
Get everything out on the counter you need, so you do not stress yourself in the middle of the decorating process :-) - 1. After you prepared your cake pops (read the bee cake pops tutorial for preparing Oreo Cake Pops), shape the cake balls like I did on the photo, in rectangle shapes. Then refrigerate them for at least 10 minutes in the freezer or 30 minutes in the refrigerator to firm up.
- 2. Melt your candy melts: I melted some white, brown and orange candy melts and mixed all together, but honestly, you can just use brown candy melts because the color does not really matter, as long as it looks like a flower pot in the end. I usually melt candy melts in the microwave in 30 seconds intervals. If you are having a hard time with the consistency of your candy melts, click here for my Cake Pops 101 Troubleshooting Guide. If your candy melts are too thick, just add a little bit of vegetable oil and stir.
- 3. Get your chilled flowerpot cake balls out of the fridge. Dip a little bit of the Lollipop Stick in the melted candy, then stick the Lollipop Stick in the Cake Pop (half way). Let the Pops rest a bit in a styrofoam block or cake dummy or on a plate, so the candy melts set within the cake pop.
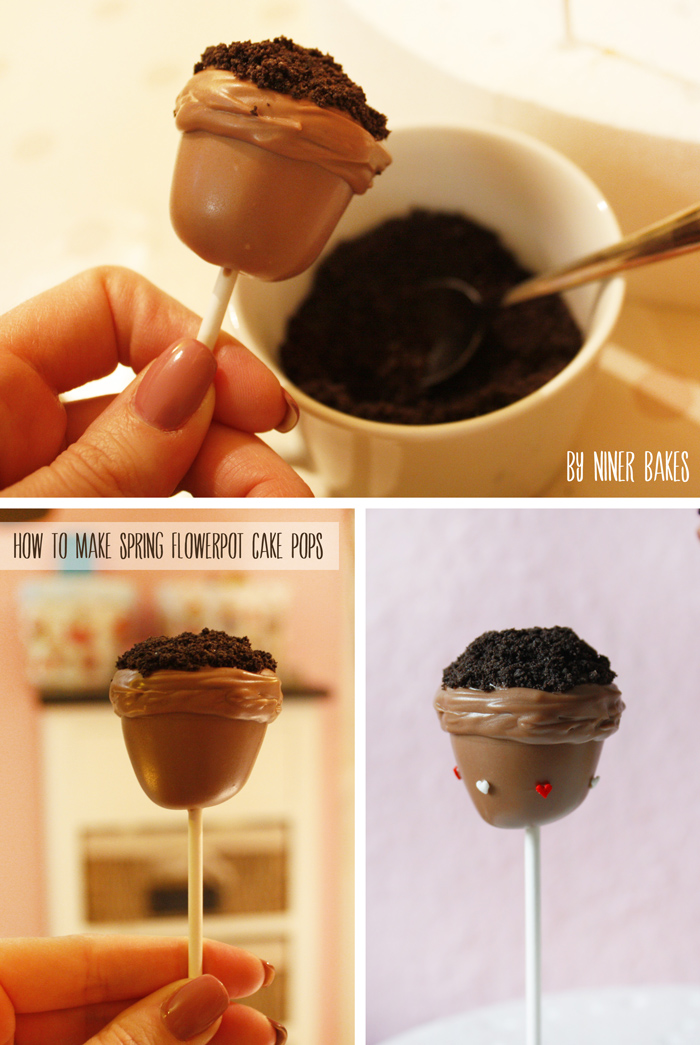
- 4. Now dip your cake pops in the brown candy melts, shake off all the excess and repeat with all cake pops and let them dry in a styrofoam block. Once dry, take a toothpick and draw a line of brown candy melts around the cake pop’s top – I did that twice and let it dry in between, so the pots will get a nice and thick border.
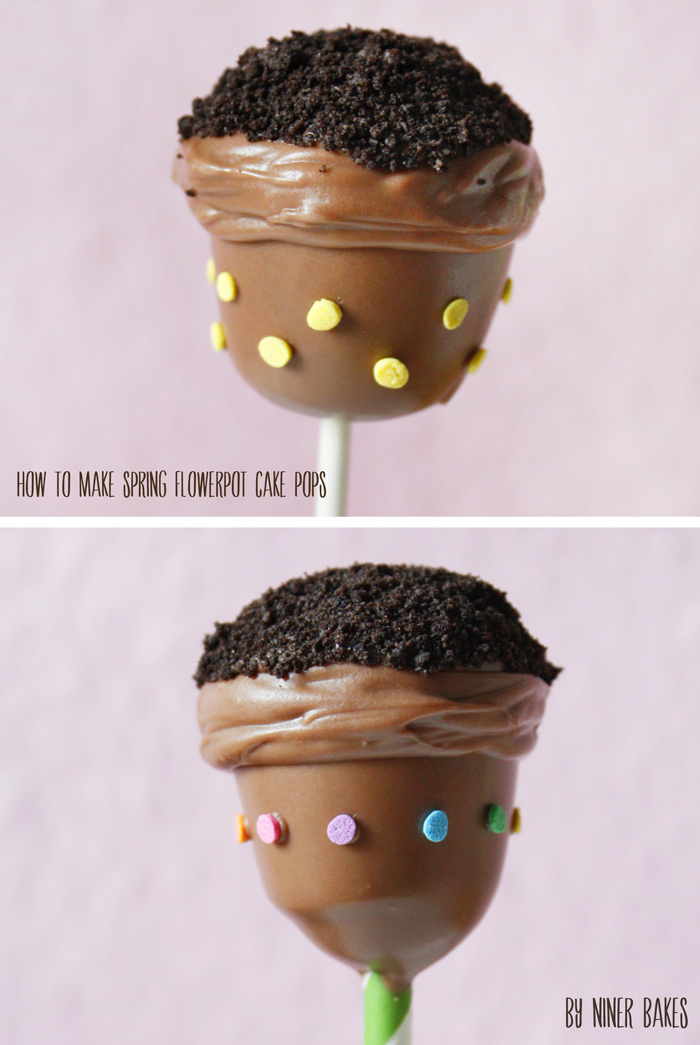
- 5. Once dry, I added a bit of brown candy melts (using a toothpick) on the very top of the cake pop and then added crushed oreo cookies to it, to give it a “flower soil” look.
Oreo cookies or dark cookies in general are perfect for that! - 6. Now you can add fondant/gumpaste flowers (using brown candy melts as glue) to your flowerpots, leaves, butterflies, anything you can imagine.
- 7. I prepared many fondant flowers and leaves a day ahead so they could harden.
Note: Any detailed decoration such as gumpaste flowers etc. that you want to use for a project: Make those ahead of time. Even days ahead, no problem.
Makes it less stressful. - 8. Now add your flowers etc. to the flowerpot, add little details to the pot itself like I did, little candy hearts or sprinkles to give it some diversity.


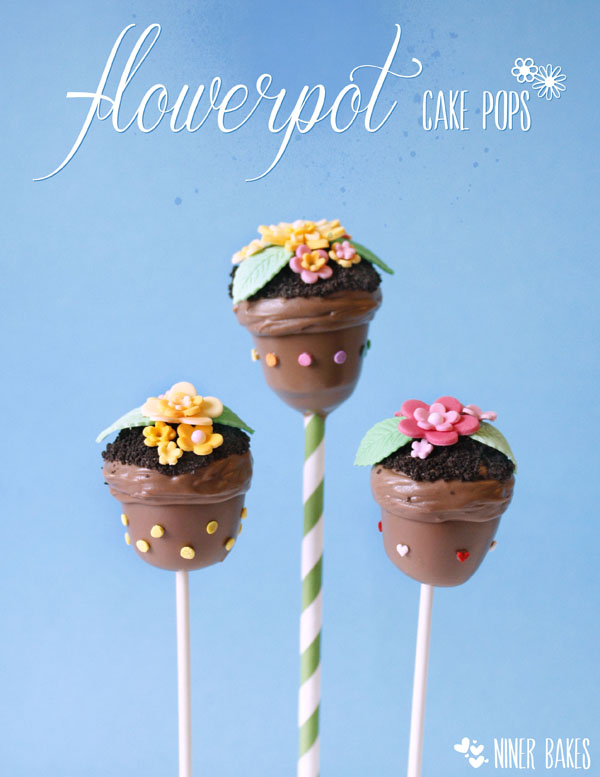
These flowerpots would be perfect for a Mother’s Day gift as well!
I hope you all had fun with today’s post.
I loved putting these cake pops together, I highly recommend to make these, you will make people happy I bet.
Wishing everyone a blessed week,
niner


")


What a cute bunch of pops and great detailed tutorial.
Thank you so much Linda, same goes out for you though as well :)
Thx for stopping by! :)
niner
Die Bienencakepops sehen richtig süß aus. :) Genauso die kleinen Blumentöpfe, super Idee! Bisher haben mich Cakepops nicht wirklich gereizt, aber hier sind wirklich tolle Sachen dabei, die werde ich bestimmt bei Gelegenheit mal ausprobieren. Jetzt klicke ich mich erst mal durch die anderen Links. ;)
What a sweet combo of cake pops – those little bees – too cute! And the photos of them are all beautiful!
These Butterflies and Flower Pots are wonderful. I want to try my hand at painting decorations. They are so pretty!
Grrr…. Bumble bees!! Your Bumblebees are adorable!
I’m in love with those adorable bumble bees, especially the one with the bow!
Awesome tutorials, niner! I can’t wait till we get to collaborate on our next project!
Wow- those flower pots are amazing!!! And I adore the cute little bow on the bee!
Your bees and flower pots turned out perfect;y darling! LOVE them!
*PERFECTLY
hey! look at us with our flower pots going on (meaning my topiary cake pops) :)
your bumble bees are the only kind i want around me and i would even welcome a sting or two!
and your flowers must have had miracle gro on them cuz they are “bee” U teefull! heehee :>D
Hey Nina,
Dein blog gefällt mir einfach so unglaublich mega dolle viel gut :-) ich kann immer kaum erwarten, bis du eine neue Idee postest… Auch die Fotos sind immer so professionell gemacht… ich steh mit meinem kleinen blog ganz am Anfang und du bist ein bisschen oder ein bisschen mehr …. mein Vorbild :-)
Liebste Ostergrüße von Mareike’
Oh my goodness, these are just so amazing!!! I love, love, LOVE them, Niner! The sweet little bees and adorable flower pots… so, so sweet!
Oh and yes, I DID get the email for this post; it was buried, but it was there. :)
Wowowowow!!! How do you do it, niner? I mean, you CONTINUE to outdo yourself! You are AMAZING, and inspirational too. Frohe Ostern!
These are so cute but I can’t decide which one I love best the bee or the flowerpot! I can’t choose, they are both perfection! xoxo
hi Nina,
Cute pops!
On another note…I desperately need some tips…how do you avoid discoloration of the paper sticks?! For me often they get yellow within minutes after finishing them, and i hate that. Often it doesnt happen within the same batch, so im clueless…id love for the sticks to remain nice white…
Other question i have, where do you buy the americolor ink pens? In europe i only seem to find rd and wilton and both are crap on candy melts :(.
Thank you so much for your advise! Happy Easter!
Hi there Zsoka,
thanks so much for your comment.
I sometimes see a little yellow-ness on the sticks as well, it is the fat from the buttercream or cream cheese within the cake pop. It does happen after days though, not within minutes. Is it possible that you use a lot of frosting in the cake pop? Try to use less if it is the case because that is the main reason why the sticks get yellow. Make sure to stick your lollipop stick in the melted candy first as well, this acts like a barrier.
I usually use brands such as Wilton or Make n Mold, those are very very cool to work with!
I usually buy my Americolor Food Pens on Ebay.com – In Europe, no chance to get them (so far, from what I researched for).
Hope I could help you, Happy belated Easter to you!
Blessings, niner
Hi Nina,
deine Bienen sind einfach klasse und ich freu mich schon aufs Wochenende, wenn ich sie nachahme…meine ersten Cakepops…nur eine Frage wievele gelbe candymelts braucht man denn so? oder schmilzt du die so peu a peu? Geht das auch im Wasserbad? Ich hab nähmlich keine Mikrowelle und will dafür nicht extra zu Freunden fahren müssen…wäre super wenn du mir die Fragen beantworten könntest…
Liebe Grüße
Jules
Hi there Jules,
danke für deinen tollen Kommentar!
Es reichen 1-2 Packungen Candy Melts für 15-20 Stück. Eventuell sogar mehr, da man Candy Melts meist noch ein wenig verdünnen muss mit Pflanzenöl, falls sie zu dickflüssig sind. Im Wasserbad ist das kein Problem :)
Alles Liebe und happy baking!
niner
Liebe Nina,
anlässlich des bevorstehenden 2. Geburtstages meines kleinen Bienenfans bin ich bei der Google-Suche nach Cake Pops im Bienendesign auf deinen Blog gestoßen….und habe mich gleich in ihn verliebt :-)
Ich möchte gern deine Bienen-Pops nachmachen…habe aber noch ein paar kleine Fragen. Kann ich die Fondantstreifen auch gleich anbringen wenn ich die Cake Pops in das Candy Melt getaucht habe? Oder muss das erst fest werden? Wie klebe ich sie denn dann praktisch am Besten nachträglich an?
Und welchen Lebensmittelstift empfiehlst du mir? Deine Cake Pops 101 hab ich auch schon gelesen, aber vielleicht hast du ja neue Erfahrungen?
Danke und viele sonnige Grüße
Jenny
Hi Jenny, danke für deinen Kommentar.
Die Fondantstreifen würde ich lieber nicht sofort anbringen, denn sonst drücken die sich in die noch flüssige Schokolade rein und das sieht sehr unschön aus (alles schon probiert hehe).
Am besten klebst du sie mit Candy Melts/Kuvertüre an, ist ein super Kleber. Einfach mit einem Zahnstocher an ein paar Stellen auftragen und dann die Fondantstreifen drüber legen und ein wenig fest drücken.
Ich empfehle bisher wirklich nur einen Stift, das ist der Americolor Food Pen.
Den gibt es auch bei Ebay manchmal.
Liebste Grüße und viel Spaß, würde mich über ein Foto freuen für meine Facebook Galerie.
niner