 niner bakes

Hi there everyone, I have a question:
Do you call yourself a geek? A baking geek I bet, or a cooking nerd?
But in general, for other things, techie things maybe? =)
I definitely am a geek, a geek for techie devices. Laptops, Tablet PC’s, Phablets (yes, theres a term like that!), Smartphones, Smart TV’s… I love it all.
I used to own a couple of Blackberry’s. But oh Lord did I miss out on the good stuff. =)
My parents made me a special gift last July for my birthday. I used to be very upset with my Blackberry because I am sort of “fast” when I navigate my phone, I like to have a fast device which lots of performance and power.
But my Blackberry always froze…
My parents gave me an Android Phone (operating system by Google), a Samsung Galaxy S II – and oh boy, how happy I was to finally have a smartphone which is really fast, customizable the way I want to…I was in techie heaven =)
Sorry to all Apple Iphone users – there is too much I do not like about them (you cannot change a lot within the user interface for example) but it’s ok, I own a couple of ipods, that’s enough. =)
Anyway,
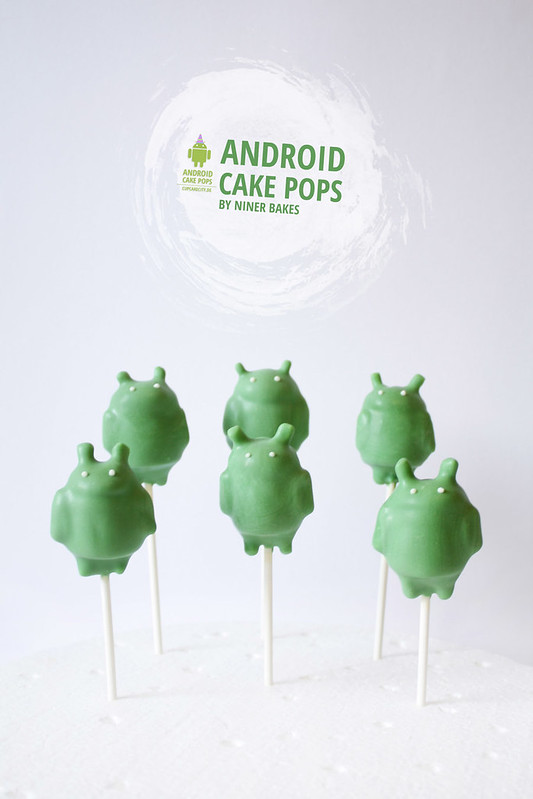
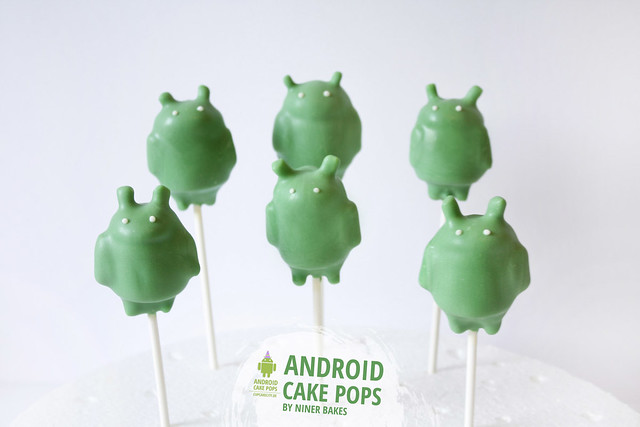
so I thought to make Android Cake Pops! I was so overwhelmed with the opportunities of an android phone, I just had so make android cake pops.
If you call yourself a geek, or your boyfriend, your husband, your co-worker: Go make these cake pops – I will show you how =)
You want to make some of these?
Please read on to see the tutorial on how to make Android Robot Cake Pops :-)
- Prep Time 30 minutes
- Baking Time has to be chilled in refrigerator before serving
- Difficulty Medium
You will need:
- uncoated basic Cake Pops, formed like the robot, chilled in refrigerator
- green candy coating (for the whole body)
- white candy coating (for the eyes)
- Easy cuttable Soft Candy Sticks or any other soft candy sticks you can find, I used sour ones, so good!
- lollipop sticks
- Toothpicks (to add eyes)
- styrofoam block (to let candy melts dry)
- Let’s get started with these cute geeky robots:
- If you have never made cake pops before, click here.
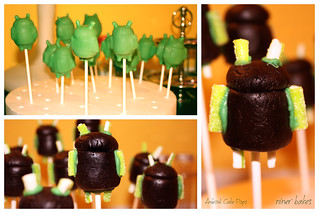
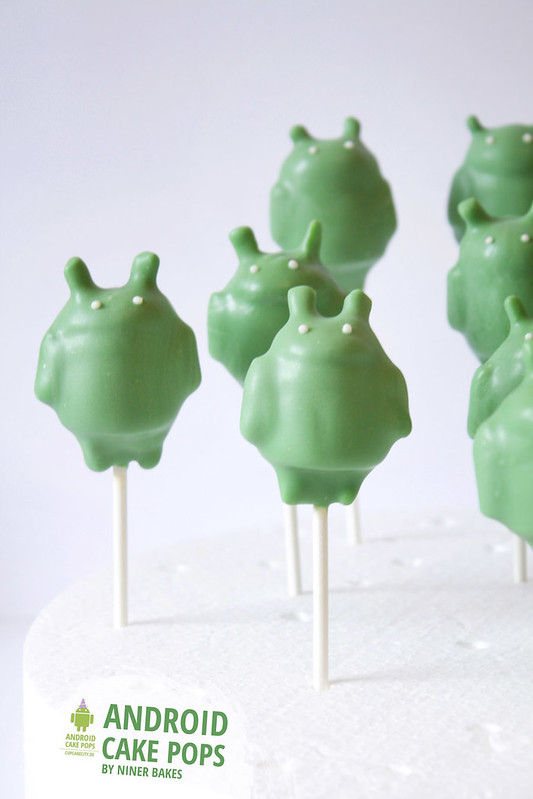
I used my favourite cake pops base, the Oreo version. I prepared the oreo cookie crumbs/cream cheese mix and started to mold the android’s robot shapes. The body is one shape, the head another. See the photo, you can see that the robot is made out of two shapes. - Melt your green candy coating in a microwave-safe plastic bowl, following the instructions on the package. Place the head shape on top of the body shape, dip a little bit of the lollipop stick into the melted candy, then stick the lollipop stick in the Cake Pop (half way). Prepare all the robots just like that, stick them in the styrofoam block and place them in the refrigerator for 30min (or 15mins in the freezer) until they are firm.
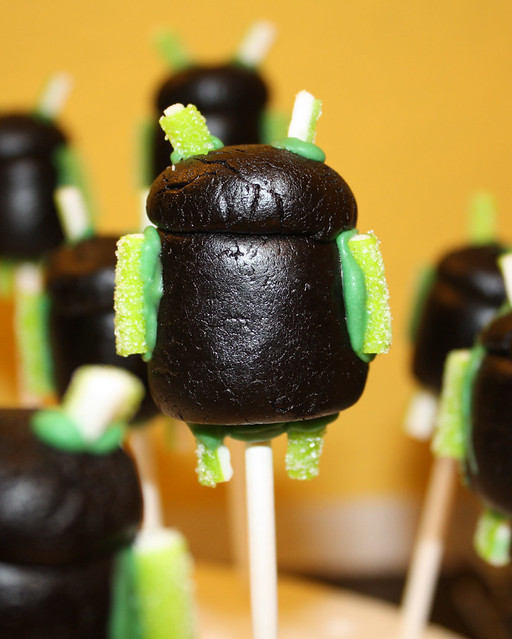
- Prepare the robots arms, legs and antennas:
I used soft sour candy sticks. I cut them in half, or even shorter / larger, just depends on how big you molded your robots. The arms got a little wider than the legs and antennas. - Take a chilled Robot Cake Pop (remove a few cake pops at a time from the refrigerator, keep the rest inside) and dip one candy arm in the candy melts and stick it on the side of the robot. Repeat with the second candy arm.
Now take a new lollipop stick on make two little holes on the head, for the antennas. This way the sour candy sticks fit better and stay in place. Now dip your “antenna” candies a little bit in the candy coating and stick them in the robots head.
Repeat the same method for the legs (make hole, dip the candy legs in candy coating and stick those in the prepared holes for the legs). Now thats very important: everything has to dry completely. Otherwise, when you dip the whole cake pop in candy melts, the antennas or arms etc. might fall off. Please do the same with the rest of your prepared robots, add arms, legs and antennas, after you are done, stick them all in your styrofoam block and place it in the refrigerator to firm up – I would suggest 30min. - Now that your “naked” robots are firm enough, you can take each Cake Pop and slowly stick it in the melted candy wafers. Note: A big cup is great because it is really deep, so pour your candy melts in a high/deep cup so you can dip the robots all the way down. Tap off any excess of coating. Now place the coated Cake Pop in your styrofoam block. Follow the steps with all cake pop robots you got, then let them all dry in the styrofoam block.
- See the photo here, this is how your robots look like before and after you dipped them into green candy melts.
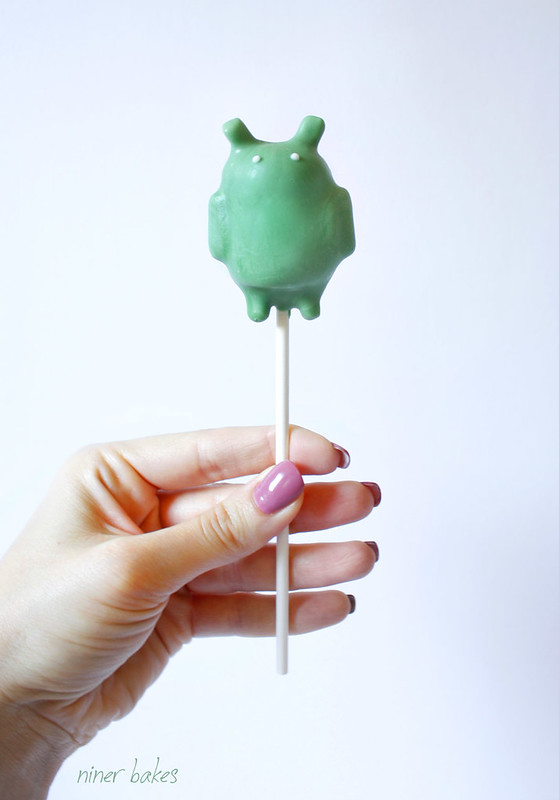
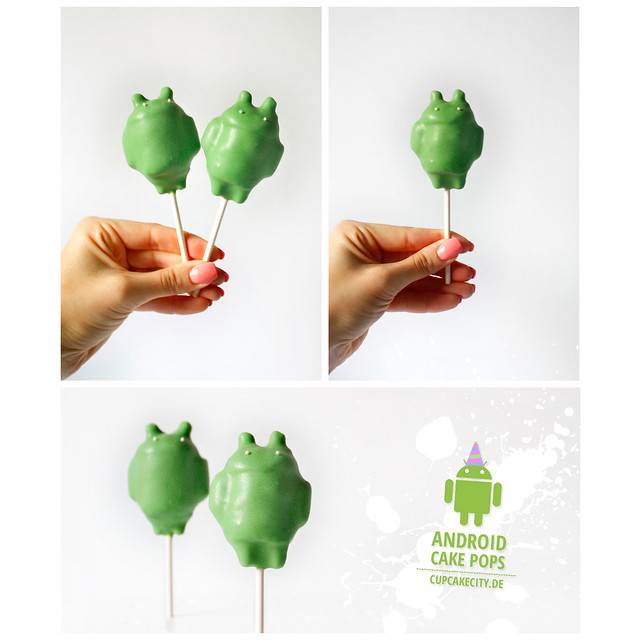
- When the green base is dry, you can heat up your white candy melts, get your toothpick and place little dots on the robots face, for the eyes.

I am sure many of you work in an office and I bet there is tons of (mostly) guys who love their android device. They would love you for making android cake pops for them.
I gave my co-worker a couple of them, he was really happy and the best: didn’t expect such a sweet, techie gift.
I also made other ones, which had a more similar color to the real android robots, I like that green way better:
Have a good week everyone!
Blessings, niner


")


OMG, these guys are adorable!! It was cool to see how they looked underneath as well.. you don’t usually see that on-line, and it’s very helpful!
xo
Very cute! Love these!
Thanks Julia =)
Many blessings..niner
Wickedly inventive, Niner! I had a chuckle to myself, because I stumbled across Facebook cake pops the other day, now Android cake pops … next I need to find some Twitter and Reddit cake pops! :)
Hi Katherine,
so glad you like them, sweet you shared them on your blog as well!
Blessings,
niner