 niner bakes

Women love handbags – it’s a fact.
It’s a dream for many to own a special purse one day, a designer purse and they would not mind to spend really a bit of cash on it. This one handbag they always wanted, a timeless piece that makes them happy.
But why do women love handbags so much?
I have to admit, I am not that crazy about them (still like some of them though), but who knows, I’d never say never.
The most obvious argument for such a handbag is the design. It does not matter if thousands of other women own it too, it’s a mystery to me, but fun to watch.
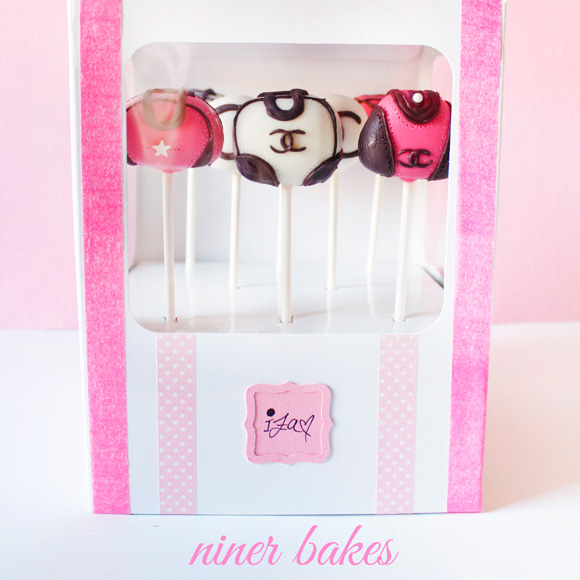
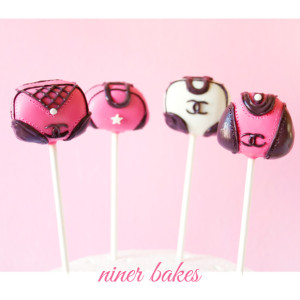
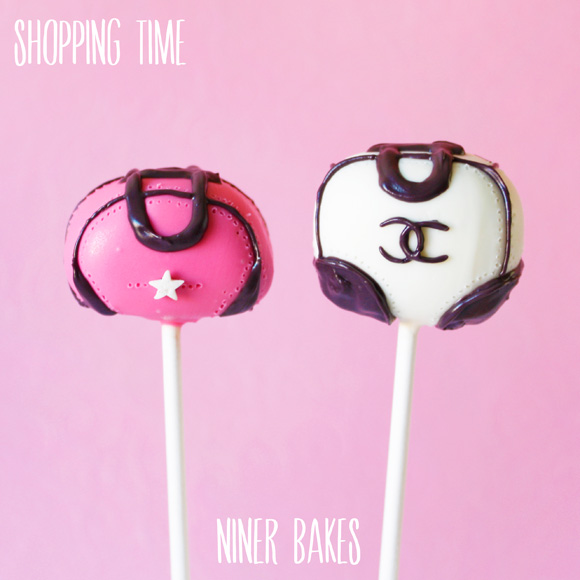
I made these handbag cake pops for a friend of mine who loves handbags, just like millions of other women out there :)

And today I will show you how to make them – so you can surprise your friend with an edible purse – or to bring to a ladies night, birthday, etc.
Let’s go:
- Prep Time 20 minutes
- Baking Time 10 minutes in freezer / 30min in refrigerator
- Difficulty Easy
- Servings approx. 36 Cake Pops á 19gr
For the Cake Pops:
- rolled cake pops from your favorite recipe or use my recipe from the blog
- Candy Melts of your choice (white, brown, black or pink etc.)
- lollipop sticks
- vegetable oil (to thin out candy melts)
- Star sprinkles etc. for little detailed designs
- toothpicks
- tweezers
- Lollipop plastic covers, to give away
- ribbon for tying, to give away
- Prepare yourself before you actually start.
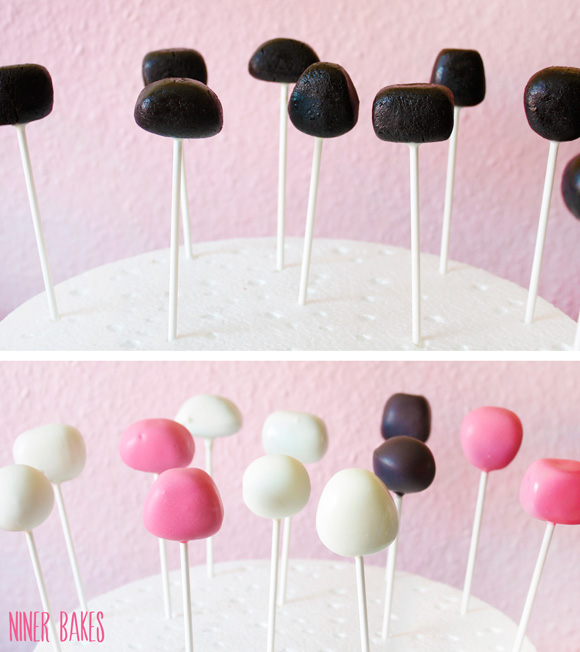
Get everything out on the counter you need, so you do not stress yourself in the middle of the decorating process. - 1. After your prepared your cake pop mix, make all kinds of shapes you desire for your purses. Oval, round etc. Please put them in the fridge for at least 20 minutes to firm up.
- 2. Melt your candy melts of your choice, and dip your ready rolled cake pops (and lollipop sticks are inserted) in your candy melts and let them dry in a styrofoam block.
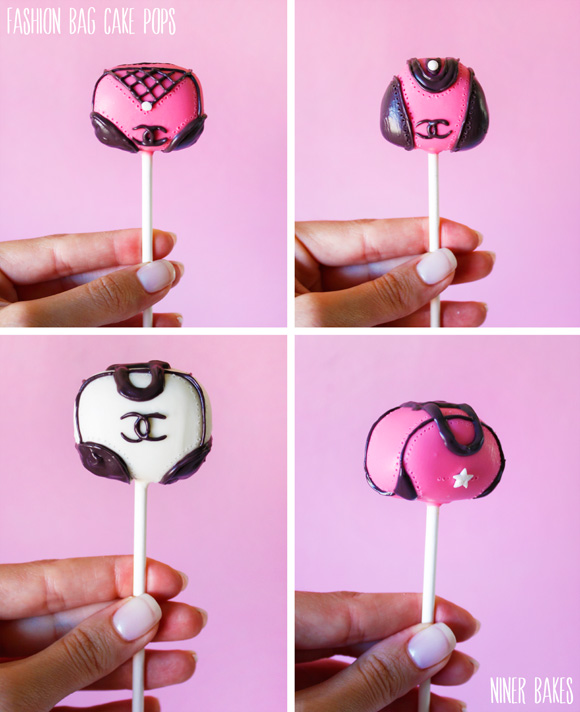
- 3. The base is ready. After the cake pops are dry, you can start by adding the details to your handbags.
You can dip them another time, but only the sides, right and left. Let dry again.
For the handles, I used a toothpick and thinned out my candy melts a little bit more by adding more vegetable oil to it. With a toothpick, “paint/draw” the black lines with your black candy melts on the cake pop to immitate the handle and other details like you see on the photos. - 4. For the stitching look, I used a toothpick and pricked in little holes in the cake pops. See how often I use toothpicks? They are great for so many things.
- 5. For a cute finish, you can add sprinkles etc. for a “logo” on the purse, or add the famous Chanel logo on the front of your purse. (Again, I used toothpicks to paint the two C’s)
Additional Items you may want to get, makes a nice gift:
Note:
If problems occur while making cake pops, please read my Cake Pops 101 Troubleshooting Guide – maybe you’ll find the answer to your problem!
And you are done.
In a gift box, they look extra adorable. I decorated the blank box with pink washi tape.

Have fun making those :)
Blessings,
niner


")


Awesome!
Really love to view your blog!
Background, content, bags, all are just fantastic. Superb work guys.
Keep it up..
Ohhhh, these are just so cute!! I’m not a huge purse girl either, but these, oh these, I would LOVE!
Love the tutorial too!!
xo
These are so cute and amazing ! I love this inner bags.
Als hättest du geahnt, dass ich sowas für den Geburtstag meiner besten Freundin gesucht habe! Grandios! Ich danke dir!